Sprinter Stock Stereo Upgrade and Speaker Replacement
In order to make this topic a more manageable size – I have broken it up into three separate parts:
- This Introduction (Part 1 of 3)
- Sprinter Speaker Replacement (Part 2 of 3)
- Aftermarket Amp and Subwoofer Install (Part 3 of 3)
- Bonus – Bluetooth ‘House’ Stereo System (bypassing head unit)
Use the links above to jump to the separate parts / posts.
Summary (TL:DR):
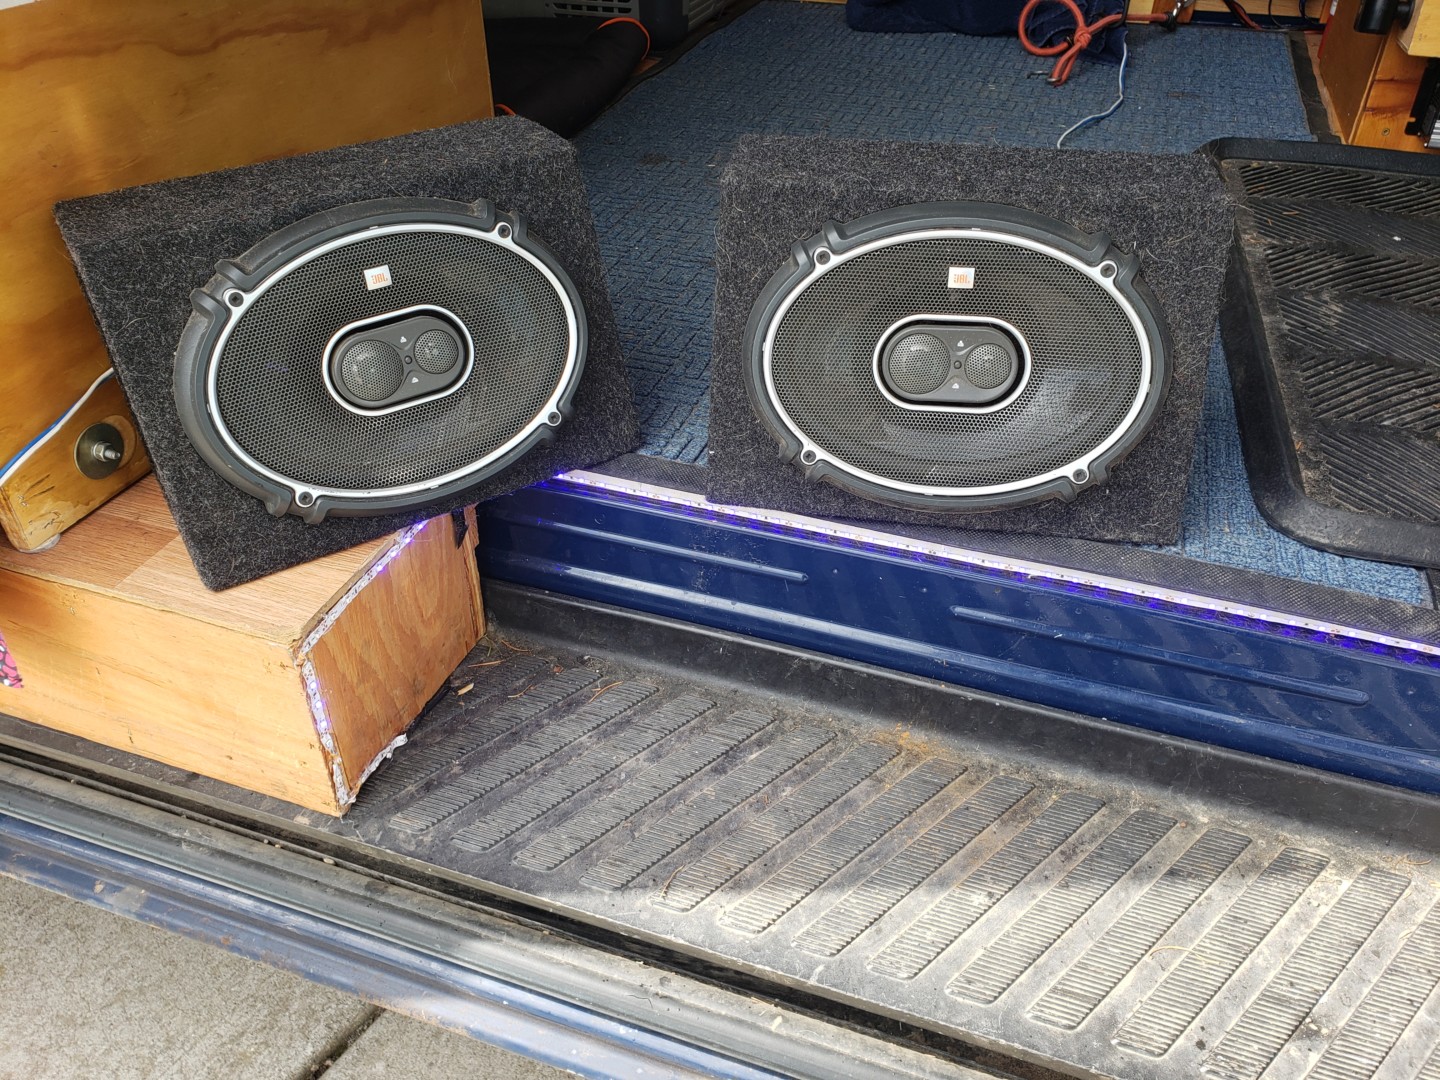
We replaced the speakers in the front doors, added rear 6×9 speakers and a separately powered subwoofer. We kept the stock stereo (cost, practicality, stock look) but added a 300W amp to power the new speakers. The system sounds great and the install was fairly straightforward. It required removing the stock stereo (though not removing the entire front dashboard) to get at the speaker wiring and removing the door panels to replace the front door speakers. But overall the install process was pretty straightforward and only took about 4 to 6 hours (including a lot of fidgeting, thinking, and theorizing).

Introduction
Its no secret the stock audio system in the Sprinter is terrible. The stock speakers are pretty much just recycled paper with a magnet glued to them (not that there is anything wrong with recycling). And the Audio 15 head unit puts out hardly any power. You are left with a tinny, weak sound you can barely hear over the road noise. Originally, I thought that fixing the road noise issue (with sound dampening and insulation) would make the stereo sound better – at least you would be able to hear it. I was wrong, once I could hear it, I knew how bad it was – I couldn’t pretend anymore. If we were going to do long road trips in the van (which was the entire point of having the van) the sound system had to be upgraded!
Lots of folks replace the stock speakers in their vans, realize that the sound from the stock head unit is still not very good (even with better speakers) and then replace the stock head unit with a different unit. We took that route at first too, and its true, the sound is still pretty bad. However, we opted to keep the stock head unit (no complaints about its capabilities to play radio or music over bluetooth) and instead added an external amp, rear speakers, and subwoofer to the mix. This made a huge difference and honestly I believe is the better way to go (if you don’t mind not having a touchscreen head unit – not a problem for us). The cost of a decent amp is similar to the cost of new head unit (including the required amp accessories) and I believe the sound improvement with an amp pushing 300+ watts exceeds the improvements you would get from a new head unit that maybe pushes 100 watts. Plus then you don’t have to deal with rewiring your steering wheel controls or need a new wiring harness, dash plate, etc. So, in summary my recommendation for the money is to add an amp and new speakers to your system and keep your existing head unit. Find out how we did that, below.
General List of Tools:
- soldering iron
- plastic trim removal tools
- Star drive (Torx) of various sizes (T-20 & T30 I think)
- Wire strippers, wire cutters, and the usual electrical gear
List of all Materials:
- Amplifier: Rockford R300X4 Prime 4-Channel Amplifier
- Subwoofer: BOSS Audio BASS1400 1400 Watt Low Profile Amplified 10 Inch Subwoofer
- Front Speakers: JBL GTO609C Premium 6.5-Inch Component Speaker System
- Rear Speakers: JBL GTO938 6×9″ Coaxial Speakers
- Speaker-Level Converter: AudioControl LC2i
- Front door speaker adapters, from Impact3D
- 18 gauge stereo wire
- Amp wiring kit: BOSS Audio KIT2 8 Gauge x 2
Reference:
- DirtDevil Build: Lots of good information on taking the front doors apart (and the dash apart which I didn’t do) – see first two pages of post
- Sound system upgrade: great write up on replacing the door and dash speakers.
The Procedure:
Our stereo upgrade involved five main steps, broken up into three posts (including this intro):
- Speaker Replacement:
- Install the door and dash speakers
- Install the rear speakers
- Aftermarket amp and Subwoofer Install
- Intercept the speaker outputs from the stock head unit and run the wiring
- Install the amp and supporting accessories
- Install the subwoofer
Conclusions
That covers my radio / stereo system recommendations for the Sprinter van upgrade. Overall I am very happy with the sound system. It is definitely a huge improvement to the overall sound in the van and the general road trip experience. The stock head unit continues to perform very well with the upgraded systems behind it. I appreciate still having the stock feel, not having to worry about integration with the steering wheel controls, or being more attractive for theft. And yet there isn’t really anything I would want out of a new head unit that I don’t already have with my phone (mounted to the drivers side vent).
Continue on to the details, with the detailed posts below:
With good music, we can drive all day and through the night (if the destination is worth it). Hope this helps, feel free to ask questions or provide comments below.


Thank you for the write up! Do you have any idea what the pink connector on the stock radio is for? Its lot labeled on our head unit… or I just cant see it.
The pink “FAKRA” connector is for the USB port that’s in the driver-side area. The four FAKRA connectors on the back are GPS (blue), USB (pink), backup camera (green), and antenna (black). See: https://sprintervanusa.com/2017/08/01/adding-an-aftermarket-stereo-head-unit-to-a-sprinter/
Hi Austin, I have a VERY INTERESTING note on my 2019 sprinter. I drove several of these 2019 sprinters and it seemed all the sound was coming from the center speaker with very little sound if any coming from the doors. You would have to get out and put your ear to the speaker to hear anything. Also, the balance on the radio did nothing, no right or left change. I went to Car Toys to buy a whole new speaker set up today with a $1000 budget. While trying to find out what size speaker was up front I pulled the cover off with my pocket knife, then popped the new speaker out. Yes, it just snaps in on the right and left and just pulls right out. When I disconnected this speaker which has 2 separate connections, everything sounded so much better. The tweeters and door speakers are now functioning as they should and actually sound really good. I ended up not buying speakers and am actually quite happy with the sound. Removing the center speaker VASTLY improved my sound and everything is functioning perfectly now. So… what does this mean? I dunno, but it works very well now and it saved me lots of money.
Aric – I’ve heard they made some improvements to the radio for the new models. But very interesting stuff about the center speaker. Very strange why they would set the balance that way. Even with the older audio units – the center speaker was a POS and worth removing. I’m glad you found out before dropping all that cash on a new system. Enjoy all the snow!
Hi, I’ve also purchased the 2019 sprinter. I was wondering how you removed the center dash speaker cover? I’m going to try the same. The speakers are so bad you can barely hear them.
I believe you just pry up the speaker cover with a plastic ‘trim removal’ tool.
Thanks for the center speaker removal tip. It worked perfectly on our 2019 sprinter!
You just saved me $1000, too! I was ready to overhaul the stereo in my 2019, wondering why they’d put such a crappy sounding system in a $65k van. I popped out the center speaker, as suggested, and BOOM! Beautiful sound. THANK YOU!!!
Hey Austin. Thank you for this thorough guide! One question, how did you get the JBL tweeter to stay on in the housing? The tweeter w/o its optional JBL adapters goes right through the housing. If I attach the tweeter to the short adapter, I can only get it held on two out of three clips (that are underneath the housing). The three clips are what held the factory tweeters in the housing.
Hello Austin. How exactly did you get the JBL tweeters held into place? Bare tweeters goes right through the housing. I also tried using the small JBL casing with the tweeter. Im able to get two of the three tabs (tabs that hold the original tweeter) locked but not the third. Thanks.
Good question. I used the casing and I just pressed them into the housing until they were tight on all sides. Nothing more than that. If you’re worried they are going to pop out again, I imagine a little super glue would do the trick?
Sorry I’m not more help. I just… Made it work.
Ok, thats the exact same thing I did. Thank you again!
Thanks for taking the time to measure! I really appreciate all the info you put up. I’ve been gathering supplies but getting ready to actually start working on the van and your posts are really helpful.
Hi Austin, thanks for writing this up. I’m going to buy the same speakers for my Sprinter. What ID size Hein adapter did you choose for your JBL’s up front? Thanks!
Wow. Good question. I think when I purchased my speaker rings from Hein they didnt come in different sizes. At least that is to say, I don’t remember. Fortunately, I was able to dig around a little bit in my garage and find the original box the JBL GTO609C speakers came in. And lucky us, the original mounting hardware for the speakers was still in the box. I measured the diameter of the JBL mounting rings and got 5.0355 (see photo) – so that seems like the 5.062 rings are the way to go.
Let me know if you have any other questions about this setup or if anything is unclear. Put all together it really sounds great.