Installing Rally Raid Lowering Links on Yamaha Ténéré 700: An 8 Step Guide
The Yamaha Tenere 700 is an exceptional adventure motorcycle boasting impressive features such as a strong, lightweight frame and advanced fuel-injected engine that make it perfect to conquer any terrain. However, with a high seat height that could intimidate shorter or less confident riders, you may find the towering position a challenge to handle, particularly when navigating through rough terrain or just stop and go city traffic where you have to put your feet down or back the bike often. This is exactly why lowering the bike could offer a more comfortable riding experience, by improving accessibility and increasing confidence both on and off the road.
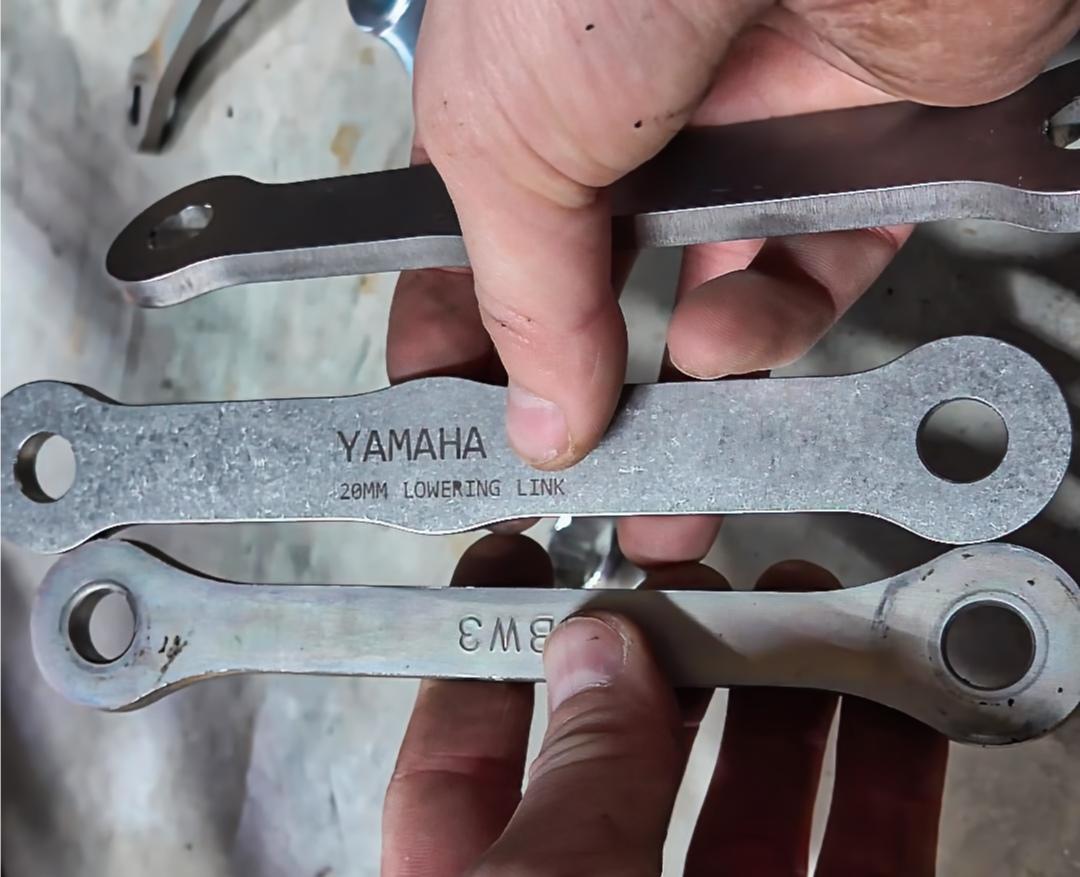
My solution comes in the form of 20mm Rally Raid Lowering Links, specifically designed to be a direct replacement for the OEM links on the Yamaha Tenere 700 motorcycle. I purchased my new links from Rocky Mountain ATV/MC for around $50, with shipping. I found the links to be a good fit for the bike, well made, and appearing to be plenty stout for the application.

While lowering links play a transformative role in enhancing the bike’s accessibility and comfort, it’s important to note that they can potentially affect the Tenere’s geometry and handling characteristics. The changes could impact aspects such as the bike’s cornering capabilities, ground clearance, or suspension functionality. However, I feel like motorcycling is a very personal endeavor and every rider and every ride is unique. I encourage folks to ride your ride and do what’s right (and safe!) for you.


From left: Tenere 700, Africa Twin, KTM 790/890
There are many opinions on the internet arguing for and against modifying your motorcycle’s height, but here at Points Unknown, we believe in personalizing your ride to suit your style and requirements. The ultimate goal is to ensure your bike compliments you, not just in functionality but also in the comfort and confidence it provides on your adventures. At the end of the day, it’s your journey, and your motorcycle should be tailored to your needs and preferences.
Let’s walk through the step-by-step process on how to install these Rally Raid lowering links:

Step 1: Raise the rear tire off the ground. Before starting, support your Yamaha Tenere 700 securely with a bike stand, center stand, or suitable holding device. If using the center stand, make sure it is braced in position so it will not collapse and drop the bike.

Step 2: Remove Stock Links. The next step is to remove the stock lowering links. Ensure you keep all bolts and nuts safely as you’ll need them for the new install. The nuts can be removed with a 17mm socket or wrench.
It can be helpful to use a rubber mallet and blunt screw driver or metal rod to push the OEM bolts out. Be careful when doing this not to dislodge the bearing sleeves.
Step 3: Install Rally Raid Lowering Links.Re-use the existing bolts, nuts, and washers with the new links.
Step 4: Check, Tighten, and Torque to Spec: Once installed, ensure everything is tightened and secure. Double check all alignments and makes sure nothing is loose. Yamaha indicates a torque of 60 nm for the lowering link bolts. Rally Raid indicates a torque of 48 nm. Pick your favorite.

Step 5: Lift the front wheel off the ground. Adjust the bike stand to the front of the skid plate or put weight on the rear of the motorcycle if using the center-stand to lift the front wheel up. Again, if using the center stand, make sure it is braced in position so it will not collapse and drop the bike.
Step 6: Loosen the pinch bolts on the upper and lower fork clamps so you can slide the fork tubes up through the clamps. These bolts can be loosened with a 10mm wrench or socket.

Step 7: Move the fork tubes through the clamps to offset the distance lowered in the back. Technically, for the 20mm of lowering in the back you could move the forks up 20mm, but I decided to add a bit more rake angle to my bike (as an experiment) so only moved them up 15mm. Yes, this will change the OEM geometry – I am okay with that. Ride your ride.

Step 8: Tighten the fork clamps back down. Spec for the 10mm bolts is 23 nm for the top (upper) bolts in the triple clamp and 20 nm for the bottom (lower) bolts on the fork clamps.
Lowering the bike does impact the functionality of the kickstand. Once the bike is lowered, the original kickstand may become out of range, making your bike lean more when parked. It’s generally recommended that you consider adjusting or replacing the kickstand to match the new lowered height for safety and stability purpose. Some riders may be able to get by with the original kickstand depending on how drastic the lowering went, but be cautious and observant of how your bike rests when parked. Remember, safety should always be your foremost priority, so don’t compromise on keeping your adventure companion steady and secure.
And voila! You’ve successfully customized your Yamaha Tenere 700 with Rally Raid lowering links. Remember to take it slow initially to get used to the new bike height and handling.


