Sprinter Adventure Van Build – Moving the back seat
Highlights (TL:DR):
- get yourself a set of sockets and torx wrenches
- Measure 858 mm back from the original seat location
- Drill carefully using a stepper bit
Picking up from where we left off in part 1 and jumping into the good stuff. Cutting holes in our brand new van!
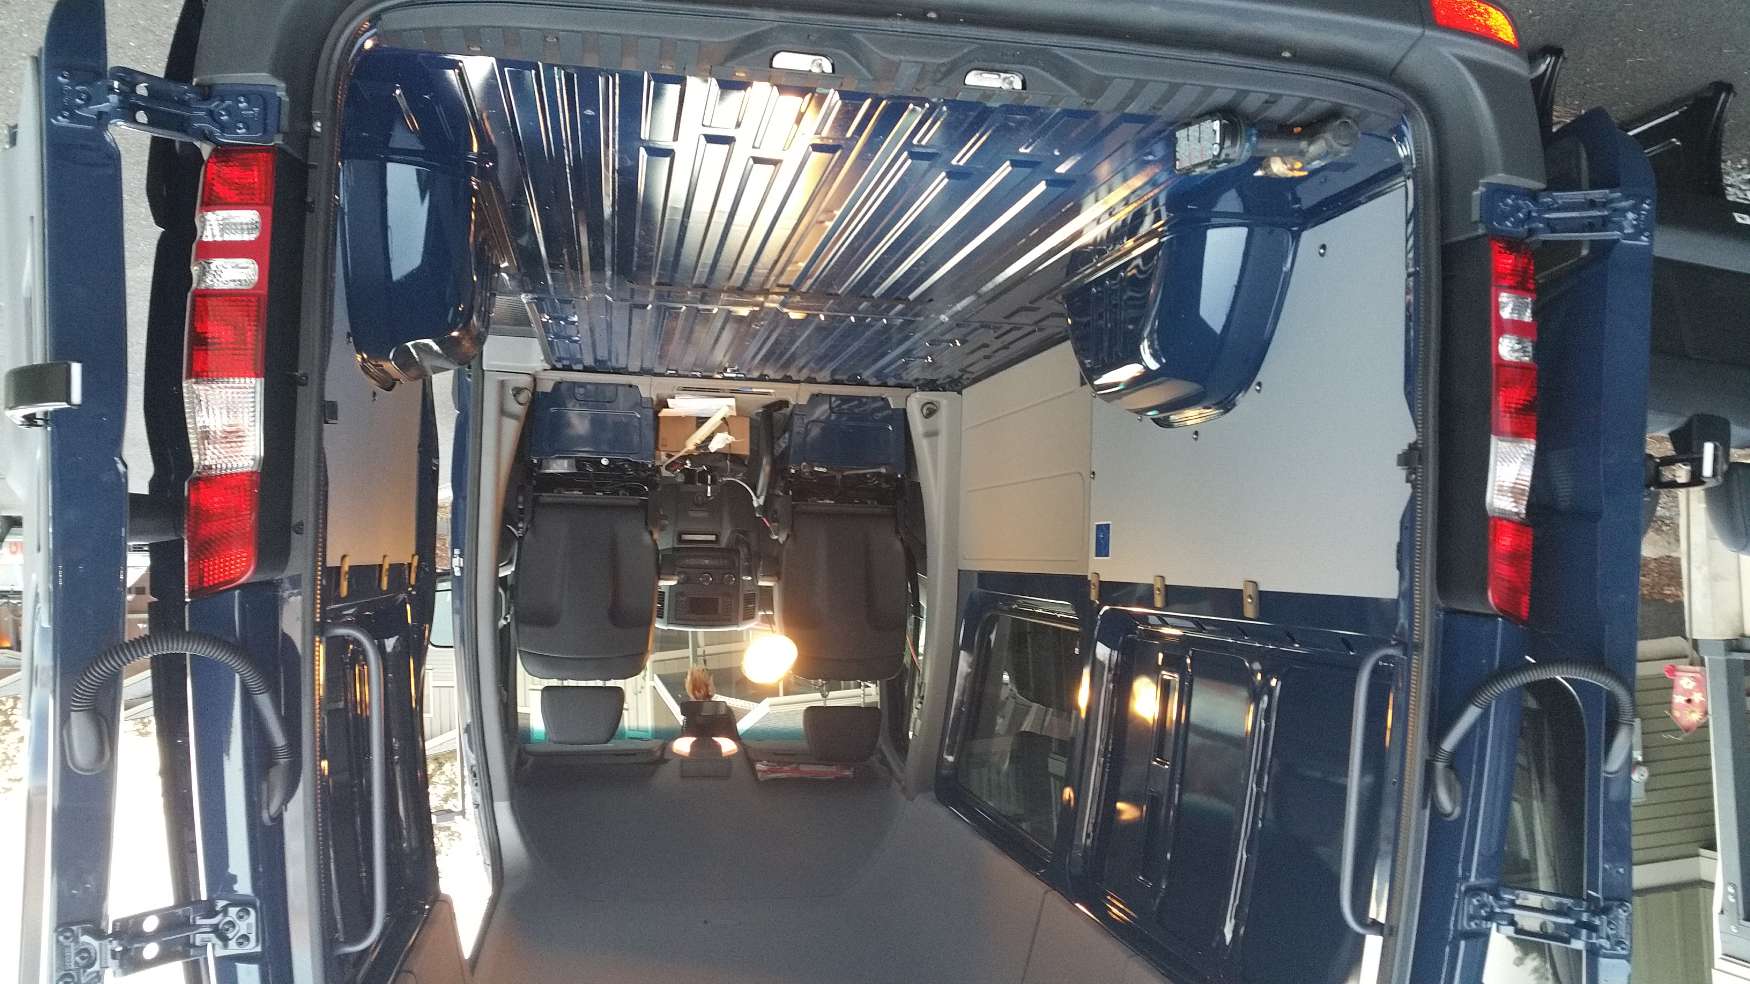
For the first project, we decided to move the backseat. The stock location of the back seat is tucked right up against the front seats, where it would need to be in the full passenger van set-up, in order to fit two more seats behind it. Of course, that made it kinda awkward for doing anything else behind it – leaving not enuff space for really – anything. So we moved the seat back!

First we consulted the be-all-end-all of knowledge bases: http://sprinter-source.com/forum/ this site pretty much provides all the information you could ever need about building your sprinter. And the people on there are super friendly if you have a question that hasn’t been asked, someone there will find an answer for you – I now believing there is nothing to be done on a sprinter that somebody else hasn’t already encountered or thought up and written down at that site.
So anyway, we consulted the database and low-and-behold there was a post (several actually) about moving the back seat. Turns out, that on the Crew vans even though the mounting points for any rearward mounting positions are covered up, the captive nuts are available in the frame. So all you have to do is drill through the van body, cut out new slots in the wood floor and mount the escutcheons (mounting plates) in the new position.
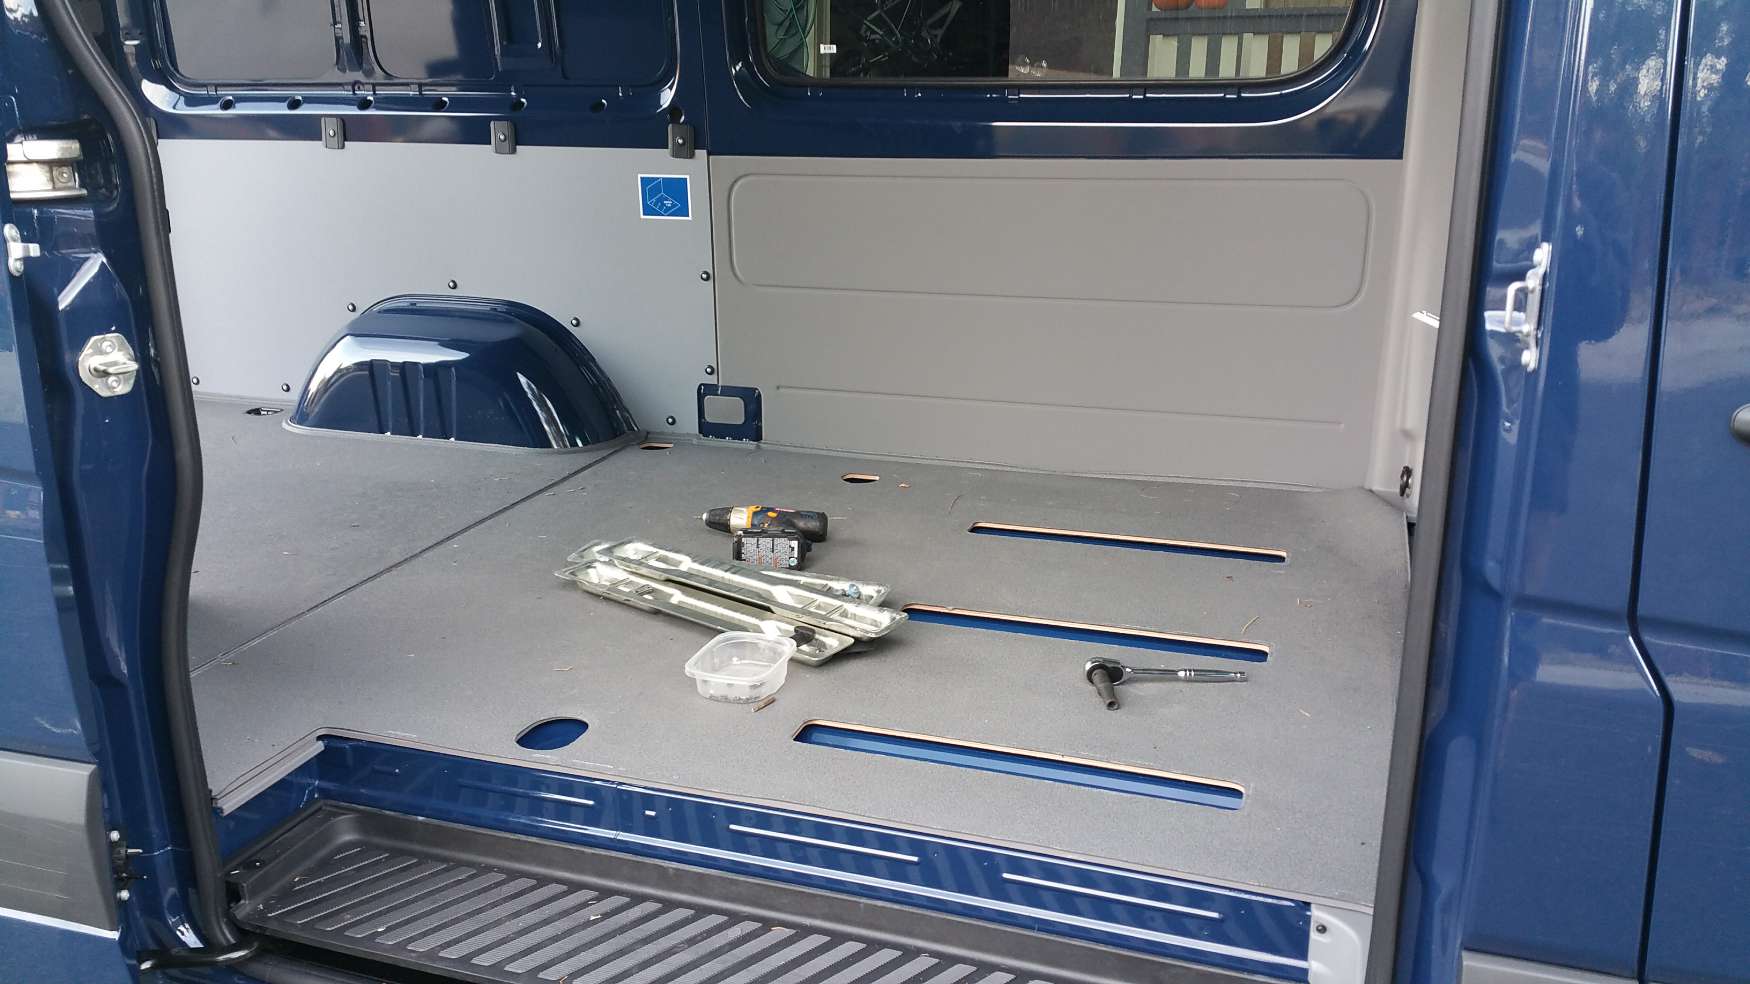
Here is the post that we followed. There is also more information in this thread and this thread. If you start from the original holes for the back seat and then measure back exactly 858 mm and drill through the floor you will find a captive nut in the frame below.

Remove the escutcheons using a 12mm socket 
Remove the wood floor with T50 torx/star drive 
Measure twice (or six or seven times) exactly 858mm from the original holes. 
If you drilled right you will find the captive nuts in there. If you drilled wrong… i dont know what will happen, but you probably wont be as happy as I was.


Here are the steps we took:
- Remove the back seat
- Remove the escutcheons. These are some weird inverted star drive type bolt fitting, but I found that a 12mm (i think it was 12) hex socket fit good enough to remove the bolts without even remotely stripping them. Your experience may vary.
- Remove the wood floor
- Measure twice (or six or seven times) exactly 858mm from the original holes. Then, using a stepper bit, carefully start drilling.
- If you drilled right you will find the captive nuts in there. If you drilled wrong… i dont know what will happen, but you probably wont be as happy as I was. Be sure to paint the newly drilled hole edges with some rust inhibiting enamel paint. Sprinter went through a lot of trouble to paint the whole chassis it would be a shame to let the van rust from a few new holes. I used a q-tip with just a little bit of paint on the end to dab around the edges of the newly drilled holes (not shown).
- Next I cut holes out of the rubber floor mat (that goes over the top of the wood floor). There are little outlines of where the holes should be cut that you can just follow with a sharp utility knife. Once you have the rubber mat cut out, it can act as a template for marking the wood floor to cut.
- By overlaying the rubber mat over the wood floor we traced the holes onto the wood flooring and then used a jigsaw to cut out the holes. We weren’t perfect in our cuts, but luckily the flange on the escutcheons covers up most minor variances.
- From there its just a matter of putting everything back together in reverse. reinstall flooring, reinstall escutcheons, reinstall seat!
It was a great first project for us. A little scary putting new holes in our van the day after we bought it, but at the same time it was also a pretty low consequences project – compared to some of the things we would do next.


Hello
From where i can buy these?
Hello – echo the comments from many others, thank you for all the info. Question, how did you seal up the holes that were no longer being used from the original seat location?
Thanks Jeff. For the holes, I didn’t do much. Just put some of the sound deadening butyl mat (Noico) over them (that I was using for sound deadening everywhere else) and called it good. Hope this helps!
Where did you get the factory bolt to instal the seat? And, do you remember what the size was?
We just moved the escucheons back from the front mounted position (as they come on the crew van) to the rear mounted position, as described in the blog. Since we were just moving things, we did not need to purchase any new bolts. If we were going to add a seat position (while maintaining the original position) we would have needed to add a new set of escucheons and mounting bolts. I do not know the size of the mounting bolts, but if thats what you are interested in, I can pull one out and measure it. Looks like you can get the escucheons themselves, here (would need 3 of them) but it doesn’t list sizing for the mounting hardware.
I am adding an additional 3 person bench (3rd row) and already have the escutcheons that I purchased off Craigslist. Just need to order bolts and coming up with the sizing info is proving difficult. Thabks
Ok. I pulled a couple out to measure if you need them. Here are a few links to some photos…
http://www.pointsunknown.com/blog/img_20180525_190146784/
http://www.pointsunknown.com/blog/img_20180525_185834153/
http://www.pointsunknown.com/blog/img_20180525_185653505/
Looks like the are M12 x 30. (though not quite 12mm, the internet tells me this is within tolerance) With a funky star drive head.
I am still confused if you are adding a third rear seat, couldn’t you just compare with the second rear seat bolts? they are the same. In any case, I hope this helps.
Would this be also applicable to Sprinter Cargo Van or only Crew Van? I pulled the floor out but couldn’t find any holes for mounting the seat.
To my knowledge there are not captive nuts embedded in the frame on the cargo van. Sorry. There is some good info available in the forums about making custom seat mounts in the cargo vans that you should check out.
Did you ever determine how to install the factory seat in a cargo? I’m working on that right now and have come up with simply using 1/2″ bolts through the bottom of the frame and a weld nut under the frame. Love to know what other guys are doing.
How did you mount the oem bench in your cargo?
Is it 858mm center to center or from an edge of the original holes?
Center to center.
I’m so happy I stumbled upon your post. This is exactly what i was looking for!!
Love the way your posts are set up with references.
Happy New Year!