Lolo Racks “Rad Lad” Bike Rack Install on Surco Ladder (Sprinter Van)
The “Rad Lad” ladder mounted bike rack kit from Lolo Racks offers some intriguing functionality – enabling handy folks to convert their rear door ladders into robust bike racks. And the Lolo Racks Rad Lad kit mostly delivers. But being a bit resourceful is definitely required – as we found some custom modification is required.
TL:DR
Installed the Lolo Racks “Rad Lad” ladder mounted bike rack kit onto the Surco Ladder that we recently installed on the back of our high roof Sprinter Van. Took some ‘customization’ and a couple of additional trips to the hardware store – but I am pleased with the final result. To be fair, Lolo Racks says this right on the site – the “Rad Lad” isn’t customized for every adventure van ladder everywhere. Its made to be generic and so users should expect some required custom modification. And also to be fair, perhaps the Surco ladder we installed on our Sprinter Van isn’t the ladder Lolo Racks had in mind when designing the kit. But I still found the improperly sized bolts and lack of nyloc nuts a little annoying. Overall though, the Lolo Racks Rad Lad, ladder mounted bike rack kit is effective and once we got everything worked out I am pretty stoked with the finished/installed product.
The Install
This covers all we had to do to make the “Rad Lad” ladder mounting kit work on our Surco Ladder. Depending on your specific setup it may be harder or easier than ours.

The Surco ladder only bolts at the bottom and clips over the door frame on the top. Because of this we had to do quite a bit of extra modifications to make the ladder “secure” when holding heavy bikes and traveling over bumpy terrain at speed (read: washboard gravel roads). We added additional bracing to our Surco ladder at the top for additional stability – certainly a weakness in the Surco Ladder, not the Lolo Racks. Once the extra bracing was installed, the ladder felt much more robust, both with bikes mounted and just for regular climbing – so this feels almost like a ‘must do mod’ for the ladder itself. And definitely a must-do modification (or something like it) if installing Lolo Racks Rad Lad on a Surco ladder.
I’ve divided up the how-to into two parts – “The Basics” which is what we had to do for the general “Rad Lad” install on our ladder. And the “Ladder Brace” which includes the additional work we did to secure our Surco ladder on our van to keep the ladder (and the bikes) from falling off. This second part is more a function of the Surco Ladder than the “Rad Lad” ladder mounting kit – but I wanted to be complete in my explanation of things.
Tools Required
Basics:
- Wrenches of various sizes
- Grinder
Ladder Brace:
- Drill
- Metal bit
Shopping List
Basic Materials:
- Surco Ladder (or whatever ladder you already have on your van)
- “Rad Lad” ladder mounted bike rack kit
- Ladder U-Bolts – McMaster-Carr Part # 8889T33
- Short strips of older inner tube
Ladder Brace Materials:
- 1″x1″ Steel or Aluminum Angle (about 10″ long )
- 1″ Wide Stainless Steel U-Bolts (hardware store)
- 1/4″ x 1″ Stainless Steel Bolts and LockNuts
- Short strip of old inner tube
Notes on Installation
The video (above) does a good job of explaining how everything goes together. I found that the Rad Lad ladder kit did require quite a bit of ‘customization’ to work with our specific ladder. And our specific ladder did require additional bracing in order to safely transport bikes. This might be different with a different ladder selection – but all I can report on is what I know. Here are my key highlights and notes:
- Lay everything out before you start drilling into your van. I’d even recommend pre-assembling the rad lad to your ladder before you even put the ladder on your van/ This will help confirm any customization needs.
- Be very careful with the initial ladder placement, keeping in mind what impact the wider rad lad bike mount bars will have on your rear doors opening (ask me how I know?).
- Make sure the ladder is very securely attached to the back of your van. Bikes are pretty heavy (even the light ones) and roads are bumpy. They will bounce around a lot back there, putting quite a bit of strain on the attachment points.
- Be prepared to ‘customize’ to fit your specific situation. I kinda expected (hoped) that everything would be ‘in the box’. It wasn’t and took a few trips to the hardware store and a special order to McMaster-Carr. Its okay, just need to remember to be patient.
Ladder Specific Install
We made a video specifically for the ladder install:
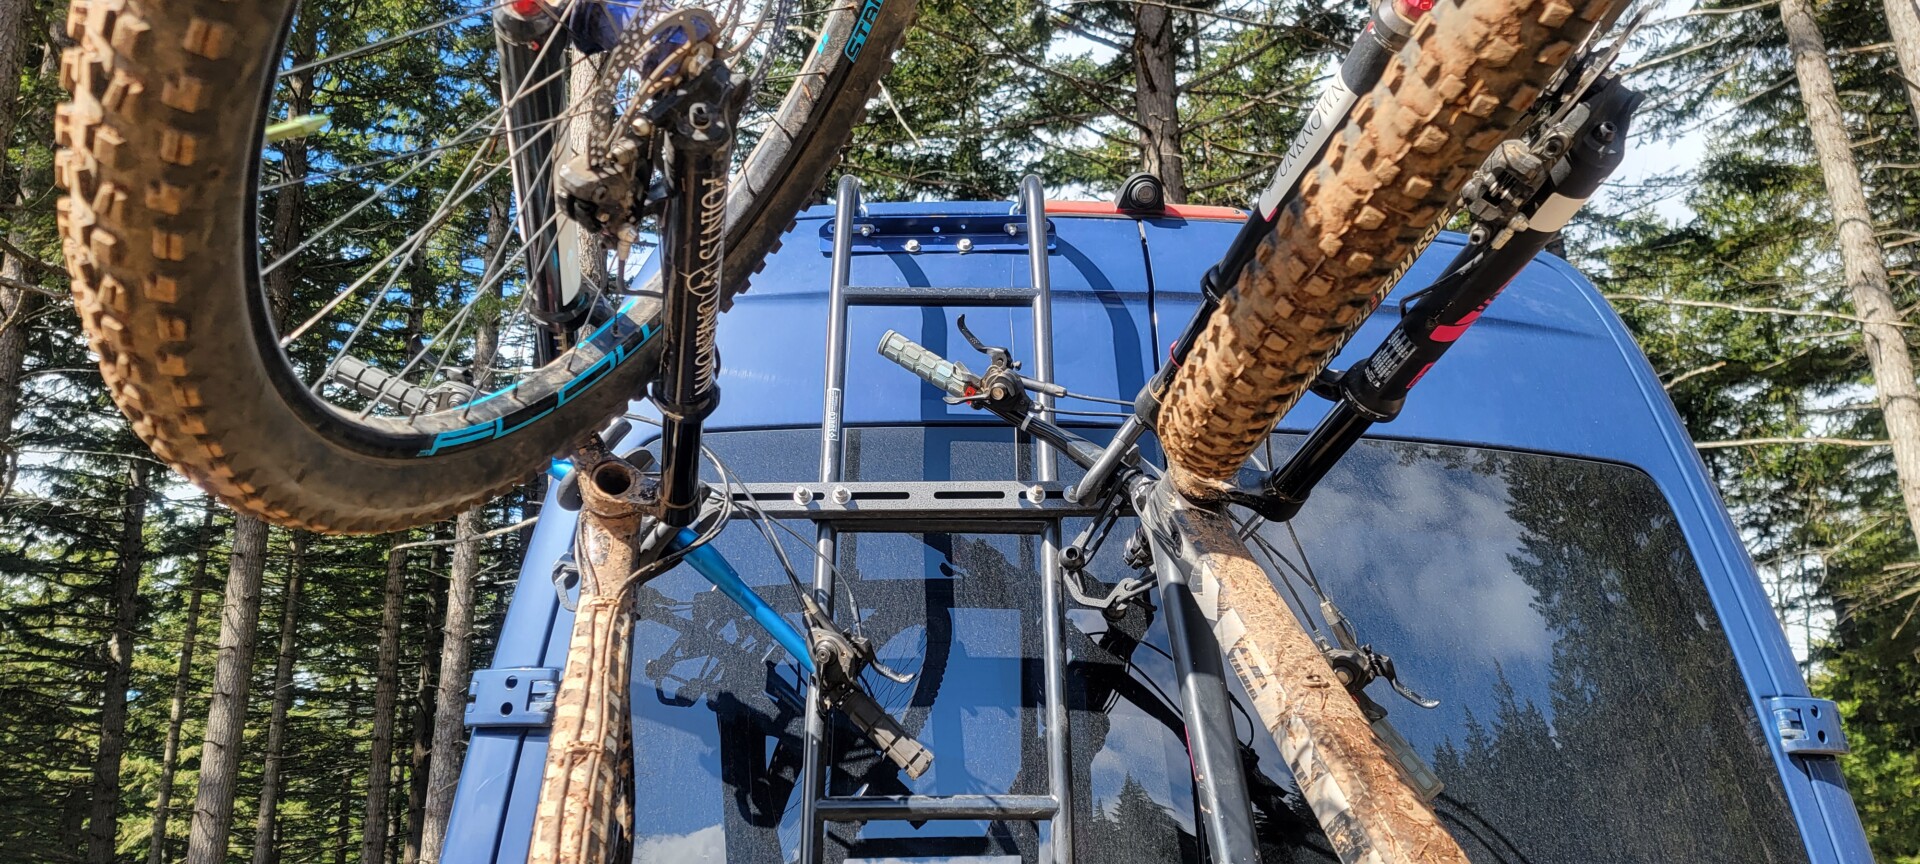
More Photos!
Below are some photos which show the finished product as well as some additional details of the ladder brace configuration.


