Tenere 700: No More Cold Hands (Heated Grips Install)
I introduced my first five accessories and upgrades for my new Yamaha Tenere 700 in a previous post that provided a brief overview of each item. In this post, I will go through selection and installation details for the Oxford Heaterz Premium Adventure Heated Grips kit for the T7. For more upgrades and accessories for the Yamaha Tenere 700, check out my overview video for my ‘first five’ upgrades and accessories.
In this video, I provide step-by-step instructions that show how I installed these heated grips on my Yamaha Tenere 700 and now enjoy the comfort and warmth they provide during chilly rides. The overall installation process is straightforward and easy, which should only take a couple of hours.

Products featured in this post:
- Heated Grips for the Yamaha Tenere 700: Oxford Heaterz Premium Adventure Heated Grips
- Factory / OEM Auxiliary Power Connector (10 amp): MT .090 3-PIN Sealed Connector – Available from CycleTerminal.com
- Generic Waterproof DC Power Connectors: 2-pin 1.5MM Connectors
Why I Chose the Oxford Premium Heated Grips for my Tenere 700?
I’ve been running Oxford Heated Grips on my motorcycles for over 10 years and have always found them to be reliable, effective, and easy to install. So when it came to getting new heated grips for my Tenere 700 I had no reason not to continue this trend.
There are many reasons why you might choose Oxford heated grips for your motorcycle. Here are a few of the most common reasons:
- Oxford heated grips are known for their quality and durability. They are made with high-quality materials and are designed to withstand the rigors of motorcycle riding.
- Oxford heated grips offer a variety of features that make them comfortable and easy to use. They have multiple heat settings, so you can choose the perfect level of warmth for your riding conditions. They also have a built-in timer, so you can set them to turn off after a certain amount of time.
- Oxford heated grips are easy to install. They come with a complete installation kit, so you can install them yourself in just a few minutes.
- Oxford heated grips are affordable. They are a great value for the money, and they offer a lot of features and benefits that make them a great choice for motorcycle riders.
If you are looking for a high-quality, durable, and affordable set of heated grips for your motorcycle, then Oxford heated grips are a great option. They offer a variety of features and benefits that make them a great choice for motorcycle riders of all levels.
In the video above, I go through how to install the highly acclaimed Oxford Heaterz Premium Adventure Heated Grips on the Yamaha Tenere 700 motorcycle. I’ve installed these grips on all of my adventure bikes over the years, and I truly believe they are some of the best heated grips on the market.
The Basic Procedure
Here are the basic steps on how to install Oxford Premium Heated Grips on a motorcycle:
- Remove the old grips. I personally like to use compressed air to remove the old grips. But a pair of pliers will do in a pinch.
- Clean the handlebars. Use rubbing alcohol to clean the handlebars where the new grips will be installed. This will help to ensure a good bond between the grips and the handlebars.
- Install the new grips. Apply a thin layer of super-glue to the inside of the new grips and the handlebars. Then, slide the grips onto the handlebars and twist them into place.
- Connect the wiring. The Oxford Premium Heated Grips come with a wiring harness that needs to be connected to the motorcycle’s battery. Follow the instructions that come with the grips to connect the wiring harness. (see detailed instructions below)
- Test the grips. Turn on the motorcycle and turn on the heated grips. The grips should start to heat up within a few minutes.
The installation kit from Oxford comes with almost everything you need to install these heated grips on the Tenere 700. And, actually, if you power the heated grips direct from the battery that is all you need. The Oxford’s grips do come with some smarts to shut down the power to the grips if you leave them on and the battery voltage gets low – but I don’t like to trust that. I prefer to wire the grips to a relay switched power source, that turns the grips off when the key is turned off.
On the Tenere 700, Yamaha conveniently provided a 10 amp switched circuit up near the front of the bike (behind the right side panel) for just this purpose! The Yamaha Tenere 700 has an accessory power socket located under right side fairing panel – actually there are two sockets in this location, a 3 pin accessory socket that is wired via a 10 amp fuse and a 2 pin accessory socket that is wired to a 2 amp fuse. This socket can be used to power accessories such as heated grips, GPS units, and phone chargers. The socket is switched, which means that it only provides power when the motorcycle is turned on. This helps to prevent battery drain. The accessory power socket is a 12-volt socket.
Detailed Wiring Instructions for Heated Grips on the Tenere 70
The basic instructions give a good overview, but if you need a little more help here is some more info specific to the Tenere 700.
- Remove the right side faring panel
- Under the panel you need to locate the 3 pin 10 amp OEM circuit. While you can wire the heated grips directly to the battery (and the oxford premium heated grips have some low voltage protection to help turn them off if you do this) I highly recommend going the “fool proof” way and wiring into a power switched circuit. So there is not chance of the heated grips running the battery down if you forget to turn them off when the bike is turned off.
- The factory circuit, located on the right side of the bike is a 10 amp circuit that is switched with the key, so there is no power running to it when the key is off. Just to be safe, I recommend detaching the negative battery terminal before doing anything electrical on the bike.
- Connecting to the factory circuit on the right side of the Tenere 700 can be done in two ways:
- The factory connector is a MT .090 3-PIN Sealed Connector. Available from CycleTerminal.com. Using this connector with the male terminal pins you can wire directly to the factory wiring, using the factory plug.
- Alternatively, if you dont want to use the factory connector, you can cut off the connector and wire in a generic waterproof connector. I like these, from amazon as you can get a multi-pack for cheap. And they have proven to be very reliable and effective for me.
- In either case, see the photos below for the wiring pin out. Both red wires are power and the black wire is ground. There is no difference between the red wires – either one works for power.
- Wire up the positive and negative terminals to the heated grips wiring harness and then route the cables to the heated grips controller and each of the grips, as shown in the instruction manual (and is pretty straightforward). Use zip ties to carefully secure all the wiring in place, making sure you have enough room to maneuver the handlebars and nothing gets snagged or hung up.
- Once everything is wired up and in place test the circuit to make sure the controller lights up and the heated grips become warm, before closingeverything back up, replacing the faring and going for a test ride.
Photo Heated Grip Wiring Guide for the T7


Additional Tips For Heated Grips Installation
For installing the heated grips themselves (not the wiring) on the Tenere 700, here are a few tips:
- If the grips are difficult to slide onto the handlebars, you can use a hair dryer to heat them up. This will make them more pliable and easier to install.
- Use compressed air to remove the old grips. Slide a nozzle tip under the edge of the grip and release bursts of air to break the grip free of the handlebar.
- Consider how any bar ends or handguards will interface with the grip and make sure there wont be conflicts before gluing everything on. You may need to trim the end of the grips – dont be afraid to do this – it’s normal.
- Apply super glue to both the inside of the grip and to the hadnlebar for the best stick. Move fast after apply the super glue – it dries very quickly.
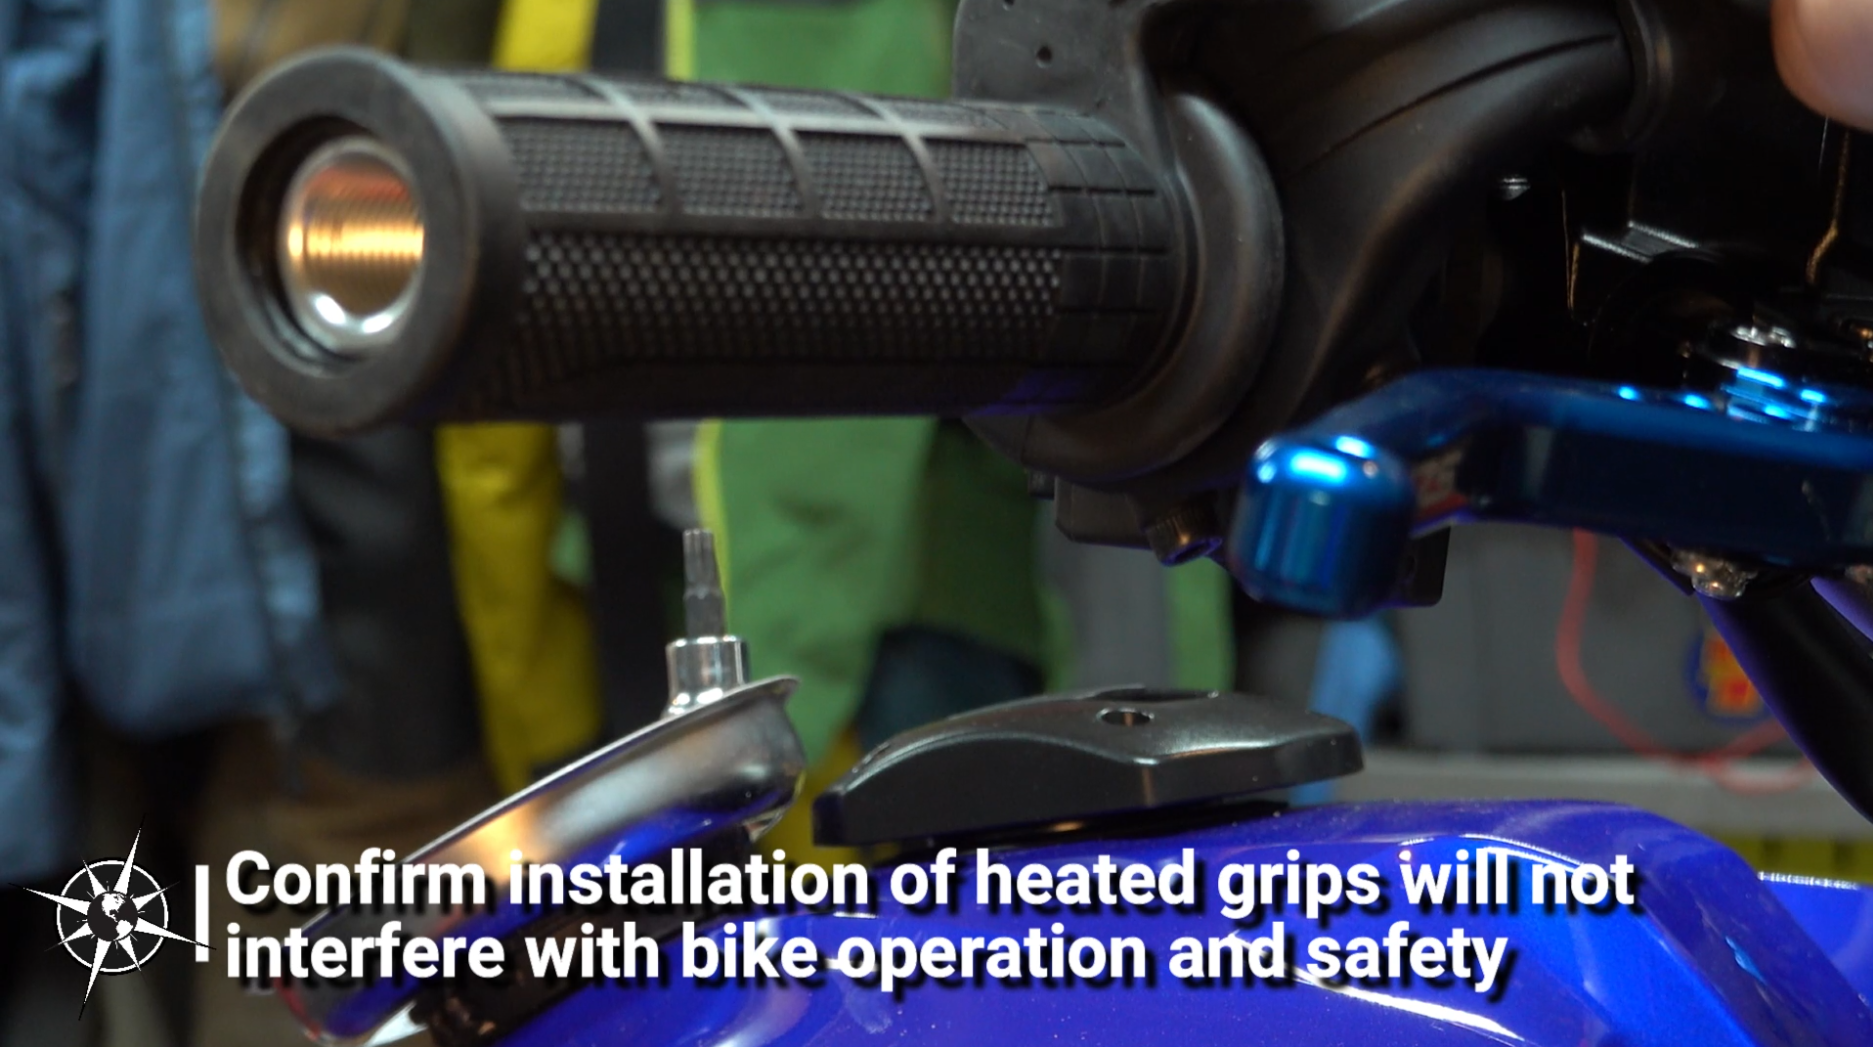
- Test the grips across the full range of motion. Make sure there is no interference with bike operation
- Specifically, test the throttle and make sure that the wires don’t interfere with the brake, when the throttle is in any position (not that you will be braking and throttling at the same time, but there still shouldn’t be any interference.


Conclusions
Thats it. Electrical work on a bike can be pretty daunting, but it really is straightforward on the T7. Just take yuour time to make sure everything is wired correctly, routed correctly, and tightened down correctly and that’s it. Warm hands all winter long.
If you have questions, please let me know in the comments, either here or on youtube. Thanks for reading.


