Tenere 700 – Rear Brake Blead and Brake Fluid Change
Over the last riding season, the rear brake on my Yamaha Tenere 700 started feeling squishy almost every time I got on the bike. I’d have to give the pedal a few pumps before it would bite, which is not what you want when you’re heading into a corner loaded with gear or picking your way down a loose descent. I ignored it all winter, but with riding season coming back around, it was time to dig in and fix it.
Symptoms and plan
The symptom was simple: the rear brake pedal had a lot of travel with almost no initial resistance, even though the fluid reservoir was full. That pointed toward air in the system rather than a purely mechanical problem, so the plan was to do a thorough rear brake bleed and pull fresh DOT 4 fluid through the line and caliper.
Tools and setup
Here’s a tools and materials list for this brake-bleed job:

Tools
- BikeMaster (or similar) vacuum brake bleeder kit
- Air compressor to drive the vacuum bleeder
- 11 mm box-end wrench or socket for the caliper bleed nipple
- T30 torx wrench, for the plastic panel over the brake fluid reservoir
- Shop towels or rags for cleanup and protecting painted surfaces
Materials
- DOT 4 brake fluid (fresh, unopened container)
- Nitrile or latex gloves to protect your skin from brake fluid
- Small container for old brake fluid
- Cleaner and a clean rag for wiping the reservoir cap area before opening


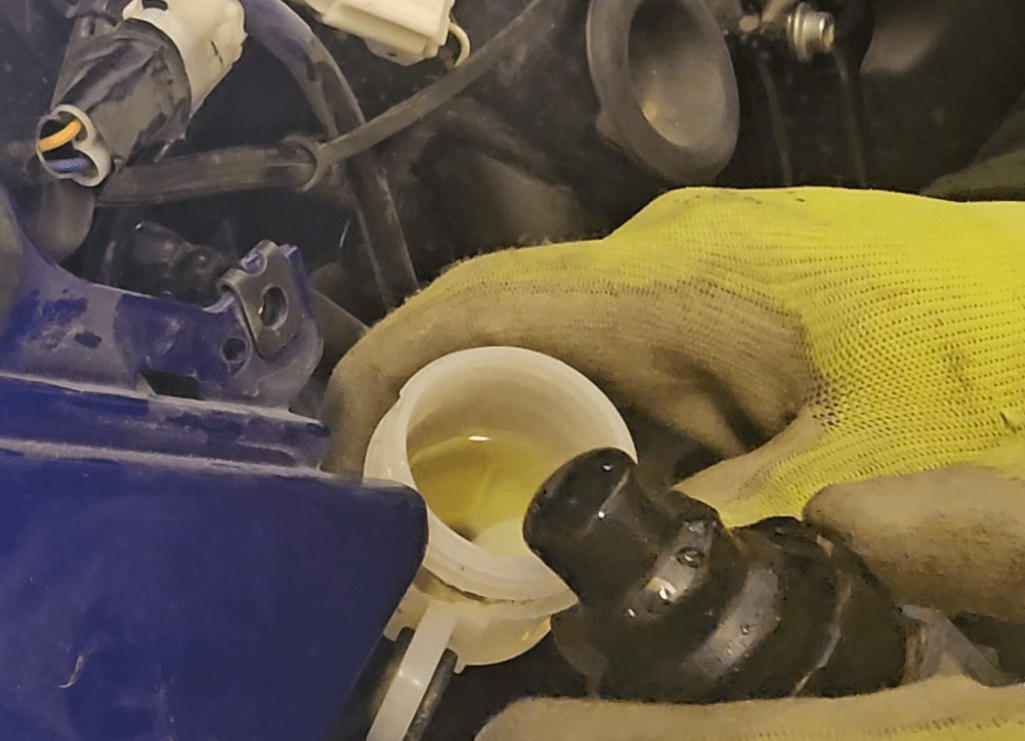
For this job, I used a BikeMaster vacuum brake bleeder kit driven by my shop air compressor. The kit hooks to the bleeder nipple on the rear caliper and uses vacuum to pull fluid from the reservoir down through the line, which is a lot easier than traditional pump-and-hold bleeding when you’re working solo.
On the T7, the rear caliper bleed nipple is easy to see once you’re down by the rear wheel. I used an 11 mm box-end wrench on the nipple, then slipped the bleeder hose over it, making sure I had a good seal before connecting the vacuum tool to the compressor.
Bleeding the rear brake
With everything hooked up, I started the compressor and cracked the bleeder screw open. You can actually watch the old fluid and air bubbles moving through the clear line, which makes it obvious when you’re pulling air out of the system versus just fresh fluid. The key is to keep an eye on the rear brake fluid reservoir and never let it run dry—if it empties, you’ll just suck more air in and have to start over.


I repeated the process in short cycles: open the bleeder, let the vacuum pull fluid and bubbles through, then close the bleeder before any air could be drawn back. After a few rounds, the fluid in the line looked clean and bubble-free, and the level in the reservoir had dropped enough that it was time to top up.
Managing fluid level and cleanup
The Tenere’s rear reservoir has a rubber plug that takes up volume, so you don’t want to fill it completely to the brim before reinstalling the plug. I filled the reservoir to just above the low mark, installed the plug, and watched the level rise to a comfortable spot juse below the high line. If it ends up slightly overfilled, you can always pull a bit more fluid through the bleeder to bring it back into range.


Once the fluid looked clean and the level was correct, I tightened the bleeder screw, removed the bleeder hose, and disposed of the old fluid. Using the vacuum tool kept the whole process much cleaner than a purely manual bleed, with minimal drips or mess around the caliper.
Result: from mushy to solid
After bleeding, the rear brake pedal felt noticeably firmer with a much more positive initial bite. The dead travel was gone, and the brake no longer needed to be “pumped up” before it would do anything, which is a big confidence boost for both street and off-road riding. A simple bleed and fluid refresh was all it took to bring the rear brake back to where it should be.
Disclaimer
I’m not a certified motorcycle mechanic—just sharing what worked on my own Tenere 700. Always refer to your service manual, follow the manufacturer’s torque specs and fluid recommendations, and if you’re unsure about any step, get help from a qualified professional before working on brake systems.


