How to Make Handlebar Mitts and Extend Your Riding Season
There are lots of ways to keep your harms warm while riding your bike or motorcycle. gloves, heated grips, heated gloves, hot hands type disposable handwarmers, etc. I’ve tried lots of them – and don’t get my wrong, I love heated grips on my motorcycle. But they don’t work so well that I don’t need to wear thicker gloves. And I have found that I really don’t like wearing thick gloves while riding – I just lose too much dexterity with a thicker glove. The solution: handlebar mitts (aka pogies, aka bar muffs, aka bar covers aka… I don’t know what to call them).
TL:DR
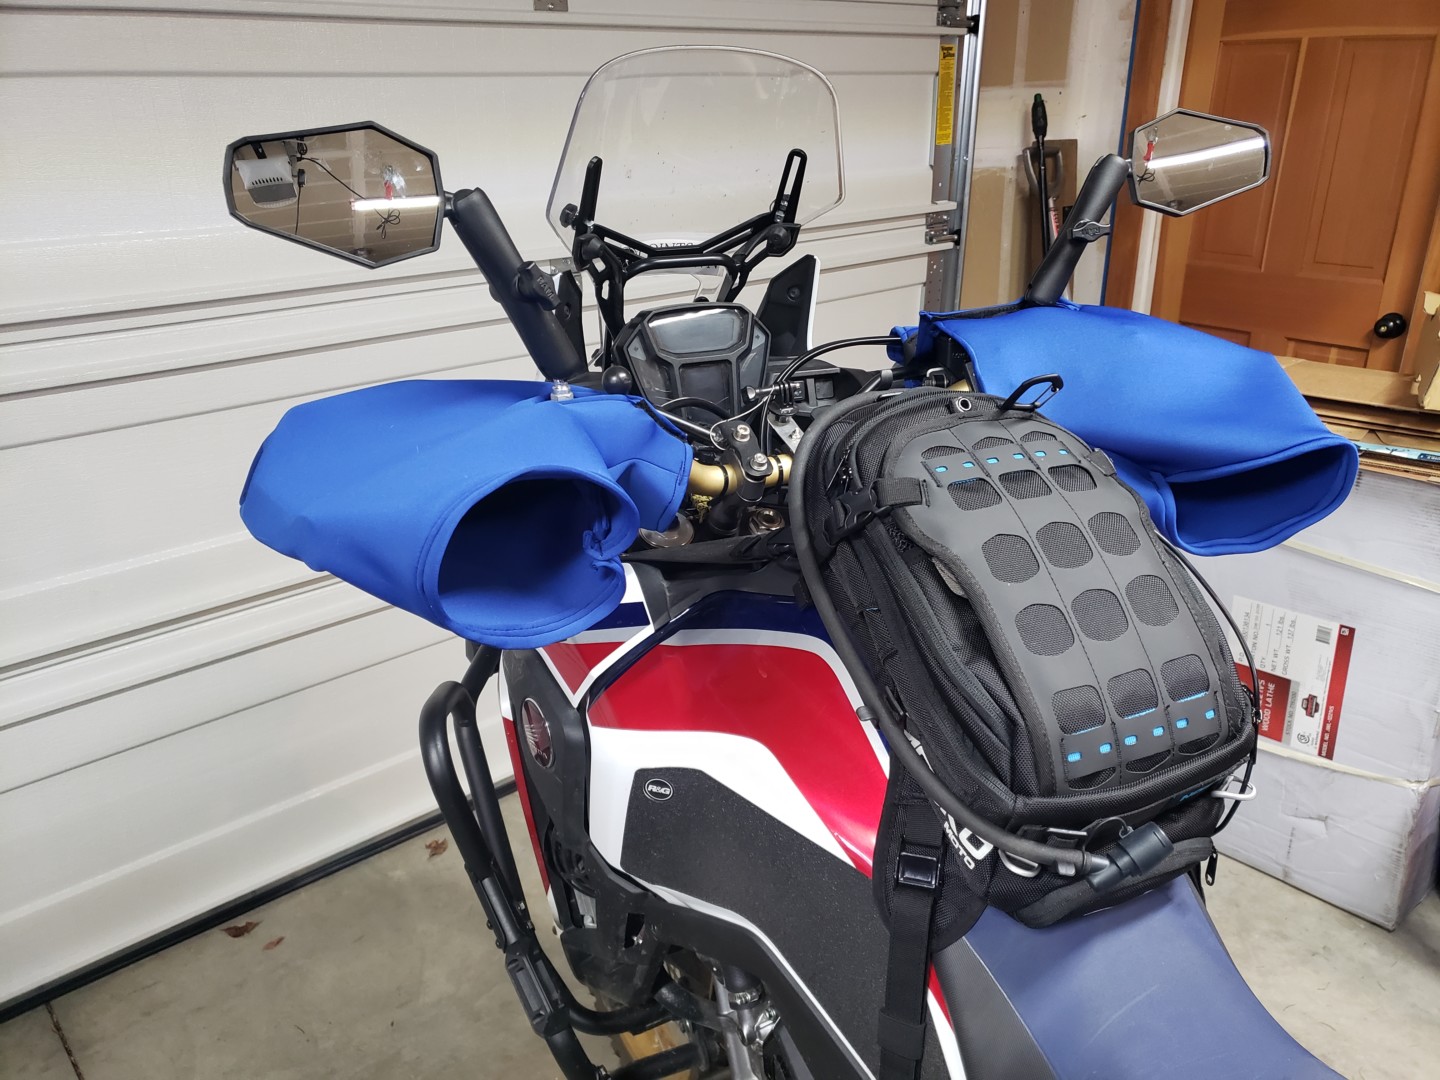
Long story short, I decided to save my $$ and make my own handlebar mitts (pogies). I used 1.5mm neoprene (probably could have gone with thicker) from amazon, made my own template (PDF layout/instructions here NOT TO SCALE), and developed a working prototype in a couple hours. I am very pleased with the results and the bar mitts are quite effective at blocking the wind and making cold rides much more enjoyable. Total cost – about $15.
Materials needed:
- 1 to 2 yards of neoprene (1.5mm – 3mm)
- 12″ of velcro (2 x 4″ strips and 2 x 2″ strips)
- 4″ of 1″ flat webbing (for end closures)
- thread
Tools needed:
- Sewing machine
- sewing needles
- scissors
- typical sewing stuff
Handlebar Mitt Construction / Sewing Procedure
Below is my rough procedure for constructing the pogies. I say rough, because, well, this was rapid prototyping – so there wasn’t a lot of measurement or pinning done initially – just cut and go. In any case, I believe these instructions are repeatable (I repeated them to make the second one) with good results:

- I first cut out the rectangular shape, encompassing the main body of the fabric I would need. This turned out to be a roughly 16″ x 28″ patch of neoprene.
- From the middle of the 28″ side, i cut out a wedge, this would give the forward outer edge of the mitt a little bit more shape
- I also cut another section of neoprene in a semi wedge shape roughly 15″ long and flaring from 1″ wide at one end to 2.5″ wide at the other.
- Next I folded the larger rectangle in half (halving the long edge) and sewed the smaller wedge into it, creating the front portion of the muff.
- To create the “L” shape, I stitched in a long ark across the starting roughly 8.5″ from the fold and finishing roughly 9″ from the front.
- I then cut off the extra fabric, outside of this new sewn arc.
- I cut a 5″ slit on one side, hemmed it, and added 4″ strips of velcro. This created a space to envelop and close around the mirror and other handlebar controls.
- I also attached a small 2″ or so section of flat webbing and velcro attachment points to close the end around the controls.
- To beef up the openings, and give them a little more structure, I rolled both openings and couple times and stitched those in.


A link to these instructions in PDF format is provided above. 
The handlebar muff shown inside out to illustrate the sewing lines, hems, slit, and curve 
the bottom of the pogie 
the top of the pogie, showing the velcro slit to accommodate the mirror and end closure.


That pretty much describes the creation process. For the other mitt I simply mirrored the design of the first. I created an instruction sheet, here: made PDF layout/instructions here, which can be used for reference. But like most Points Unknown projects, I encourage your own creativity and would love to hear about upgrades and improvements in the comments.
Of course, if you don’t want to make your own, you can always purchase them. I hear the best are hippo hands.


