Motorcycle Boot Gaiters / Moto Pant Cuff Protector
The Problem:
Motorcycle pants are expensive (even if you get cheap ones) and the cuffs get torn up by the pegs, inside frame of the bike, just walking around, etc. Worse, your motorcycle pant leg can get stuck on the moto foot peg when you go to put your foot down. If it gets stuck long enough, you fall over – that is just plain embarrassing. Of course, inside the boot pants solve this problem, but also provide a direct path for water onto your foot, when riding in the rain or through a puddle, creek, river, etc. How do you protect your pant cuffs without turning your boots into a bucket?


The Solution: Motorcycle Boot Gaiters / Pant Cuff Protectors

The use if gaiters is nothing new – mountaineers have used gaiters forever to protect pant legs from crampons. But I couldn’t find anything for a motorcycle boot and I wanted something that echoed the durability and ruggedness of adv riding. So I had to make my own. Introducing DIY Points Unknown Rugged Motorcycle Boot Gaiters!
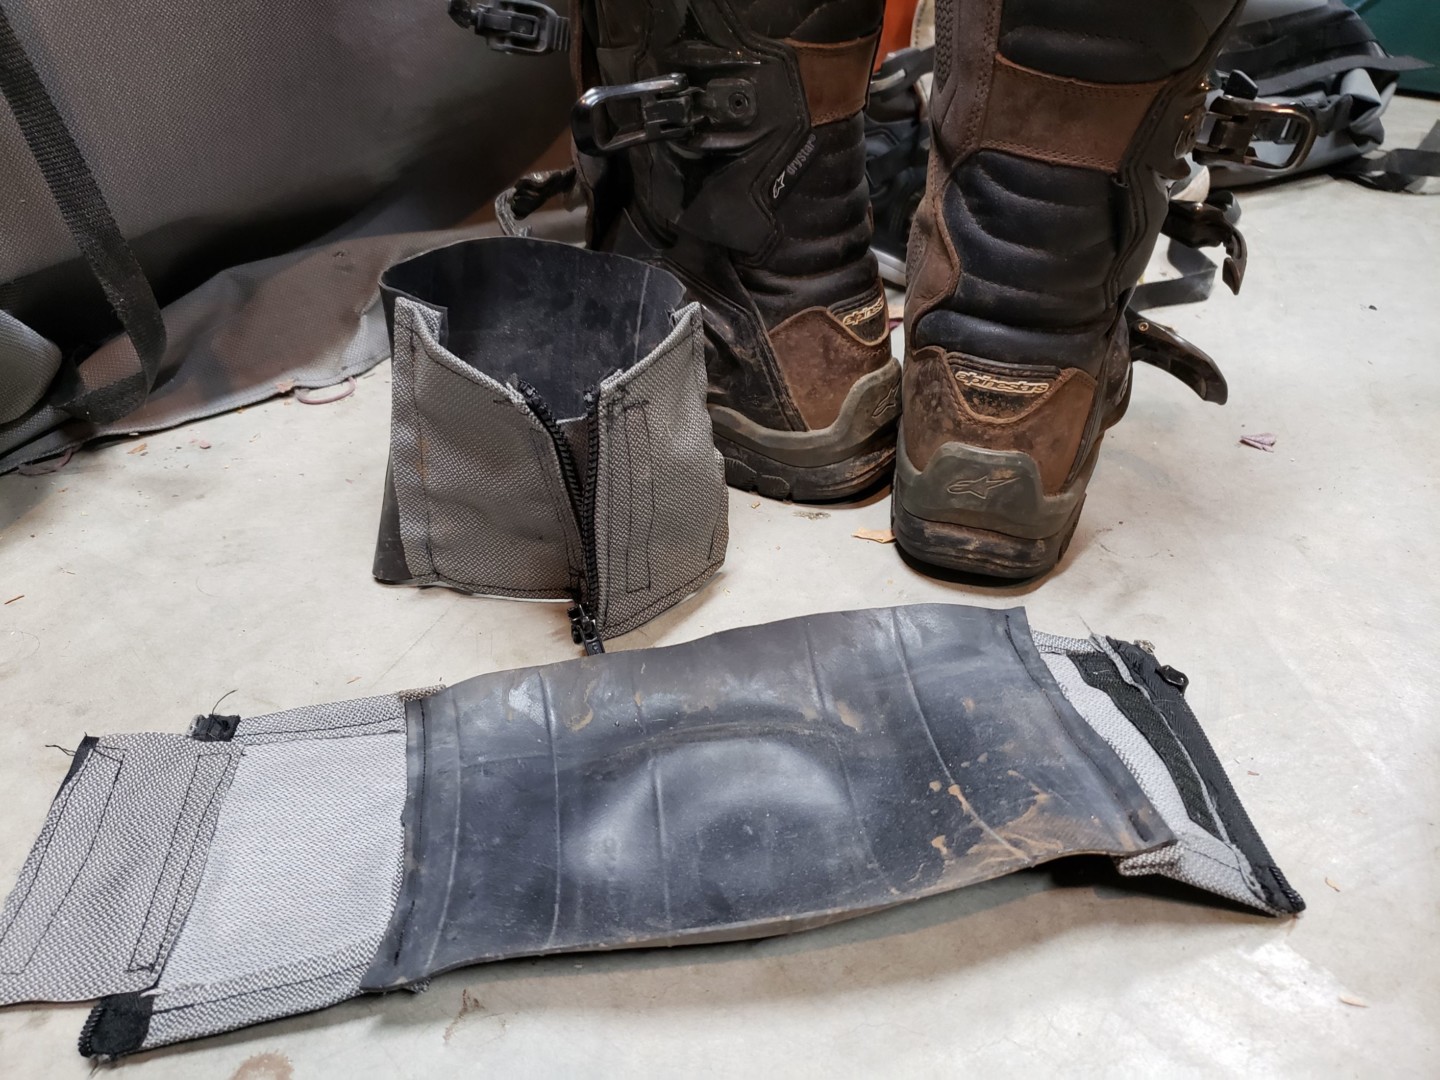
These gaiters solve the problem of damaging your pants on motorcycle pegs or through normal wear and tear and keep everything tight to the boot so there is nothing to get stuck when putting a foot down. They do all this, while keeping pants outside the boot so water can’t come in either.

The basic concept and construction is pretty simple, I used an old heavy duty inner-tube, a zipper, and some ballistic nylon I had lying around. Version 1.1 added velcro flaps to make it easier to hold the gaiter together while doing the zipper. Total time for design and construction – approximately 30 – 45 minutes.
Materials:
- Old moto inner tube. I used heavy duty tube from the Versys front wheel, but lighter duty would probably be easy to sew through. Needs to be a big enuff tube to give you two ~6″x10″ pieces.
- ~6″ Separable zipper. The separable part is key
- Ballistic nylon. Only need about a 2’x2′ square to make all the pieces
- Velcro (optional, but helpful to make them easier to put on)
Tools and Procedure
- Once materials are assembled, construction is fairly simple using a sewing machine – I have a pretty basic sewing machine and though it struggles just a little to get through the rubber it does just fine. A robust denim sewing needle (or similar) is probably helpful.
- With the inner tube – Cut two 6″ sections out of the inner tube, then cut the loop so you have two 6″x10″ pieces (depending on the diameter of the tub, you might have to adjust the cutting scheme).
- With the ballistic nylon – Cut four 4″ x6″ pieces (for the cuffs and zippers) as well as four 2″x5″ flaps (for the Velcro).
- Hem the ballistic nylon and install the zippers on two pairs of the 4″x6″ pieces. Attach the other half of this assembly to the rubber pieces of inner tube. (optional) Put Velcro on the smaller nylon flaps and attach the flaps just inside the zippers. This provides a nice mechanism to hold the gaiters on while you are doing up the zipper.
- Install on the boots. The fit around the boot cuff is tight – requiring the rubber to be stretched a little bit. This is what I wanted – to keep everything as close to the boot as possible. Dimensions above may need to be modified depending on the size and geometry of your boot.
Go for a ride – enjoy!


I have only had a chance to try these out on a few rides so far, but so far so good. As you can see by the mud in the photos, the test rides have been muddy but the gaiters have done their job keeping water out and holding the pant legs in, protecting them from damage, and me from embarrassment. Highly functional and (if I do say so myself) quite fashionable as well.
Questions on the construction? the reason? the function? Let me know in the comments!


