Kawasaki Versys X-300 – Fairing Removal Quick Reference
This is just a short post outlining the removal of the front fairing for the Kawasaki Versys X-300 (2017).
Tools
- 4mm allen key
- 4 mm allen socket for ratchet with extension
- 5mm allen key
- 8mm and 10mm box end wrench
- 8mm and 10mm sockets with ratchet extension
- Small flat head screw driver (for pop rivets)
The Procedure
After removing the bolts indicated below, each plastic part should be able to be pulled away from the bike. In most cases there are plastic/rubber grommets which pop out when a little bit of pressure is applied. Be gentle and take your time and it should all come apart and go back together just fine.
Windshield Removal

4 x 5mm allen bolts to remove windshield. Mind the large plastic washers.
Side / Tank Fairing Removal

2 x 4mm allen bolts on right side tank fairing 
2 x 8mm bolts on left side tank fairing
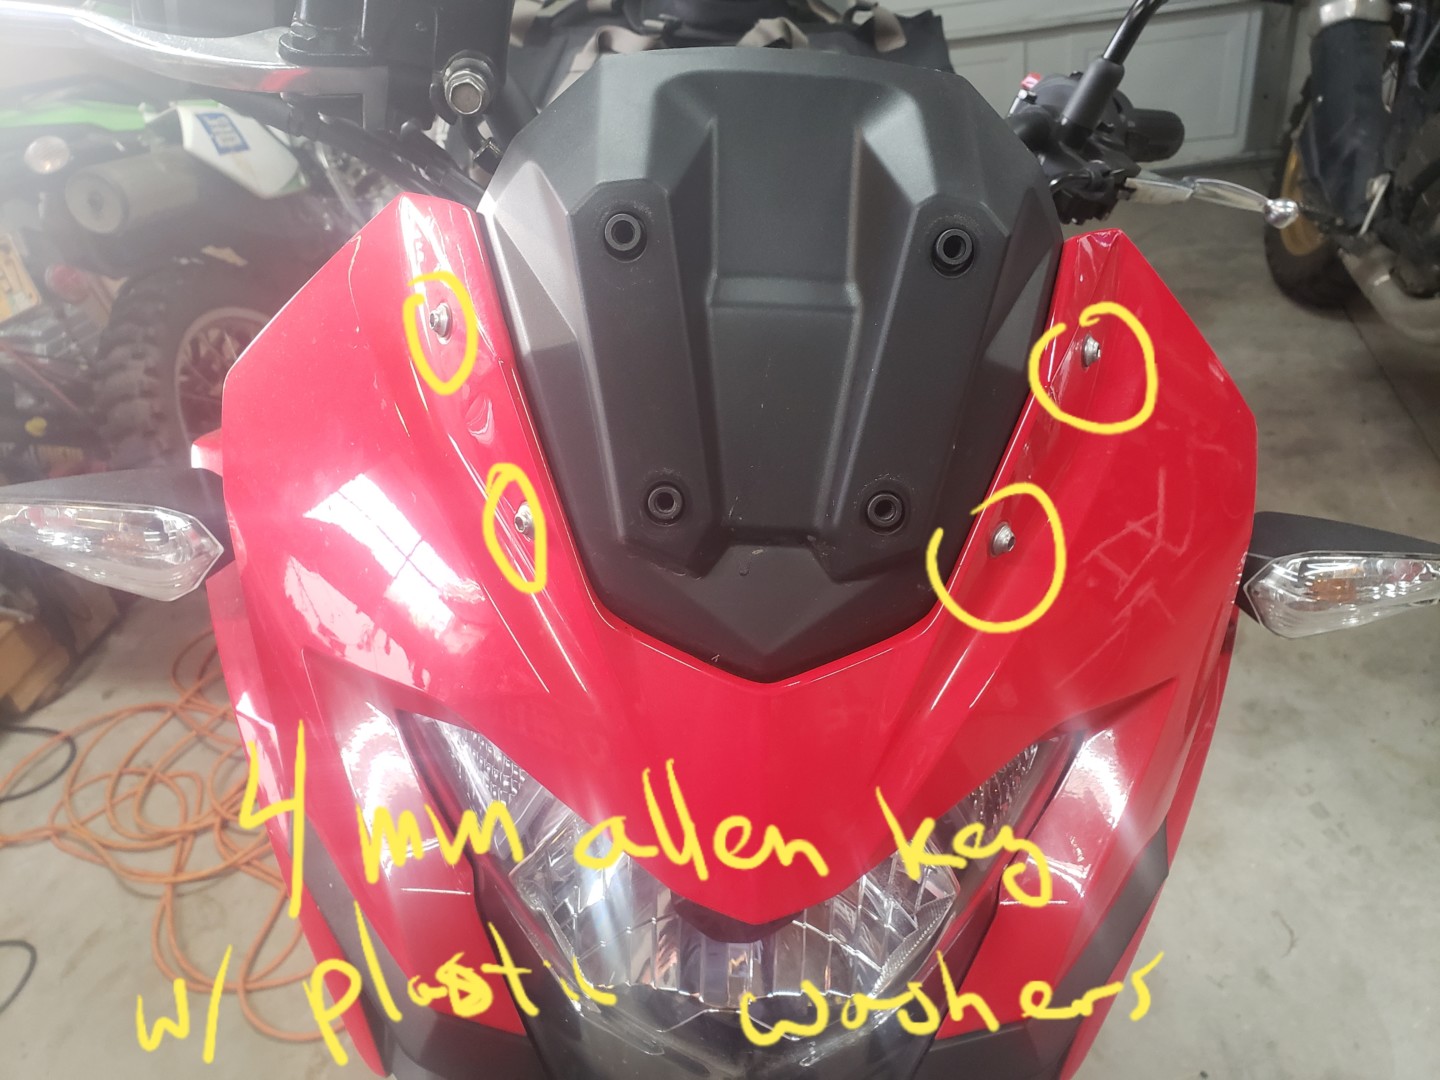
Front Fairing Removal

4 x 4 mm allen bolts on the front headlight fairing + 
+ 2 x 4mm allen bolts on each side of the headlight fairing
Side / Front Fairing Removal

1 x 4mm allen bolt on the top of each side fairing (one on each side) 
1 x 4mm allen bolt somewhat hidden on each side (ratchet extension recommended) 
3 x pop rivets on each side fairing on either side of the fork 
2 x pop rivets on either side of the headlight/turn signal assembly 
2 x 10mm bolts – reachable with a box end wrench 
2 x 8mm bolts
Turn Signal Assembly / Headlight Fairing Removal
2 x pop rivets on either side 2 x 10mm bolts – reachable with a box end wrench. One on each side. 2 x 8mm bolts
Slideshow Summary of Versys X-300 Fairing Removal

Right Side Tank Fairing 
Left Side Tank Fairing 
Windshield 
Front Fairing (1 of 2) 
Front Fairing (2 of 2) 
Side Fairings (1 of 3) 
Side Fairings (2 of 3) 
Side Fairings (3 of 3) 
Front Turn Signal / Headlight Fairing (1 of 3) 
Front Turn Signal / Headlight Fairing (2 of 3) 
Front Turn Signal / Headlight Fairing (3 of 3) 
Example of 4mm allen bolts with small plastic washers 
Example of 5mm allen bolts with large plastic washers (for windshield)


