Sprinter Adventure Van – New Ceiling and Wall Panel Installation (+ lighting)
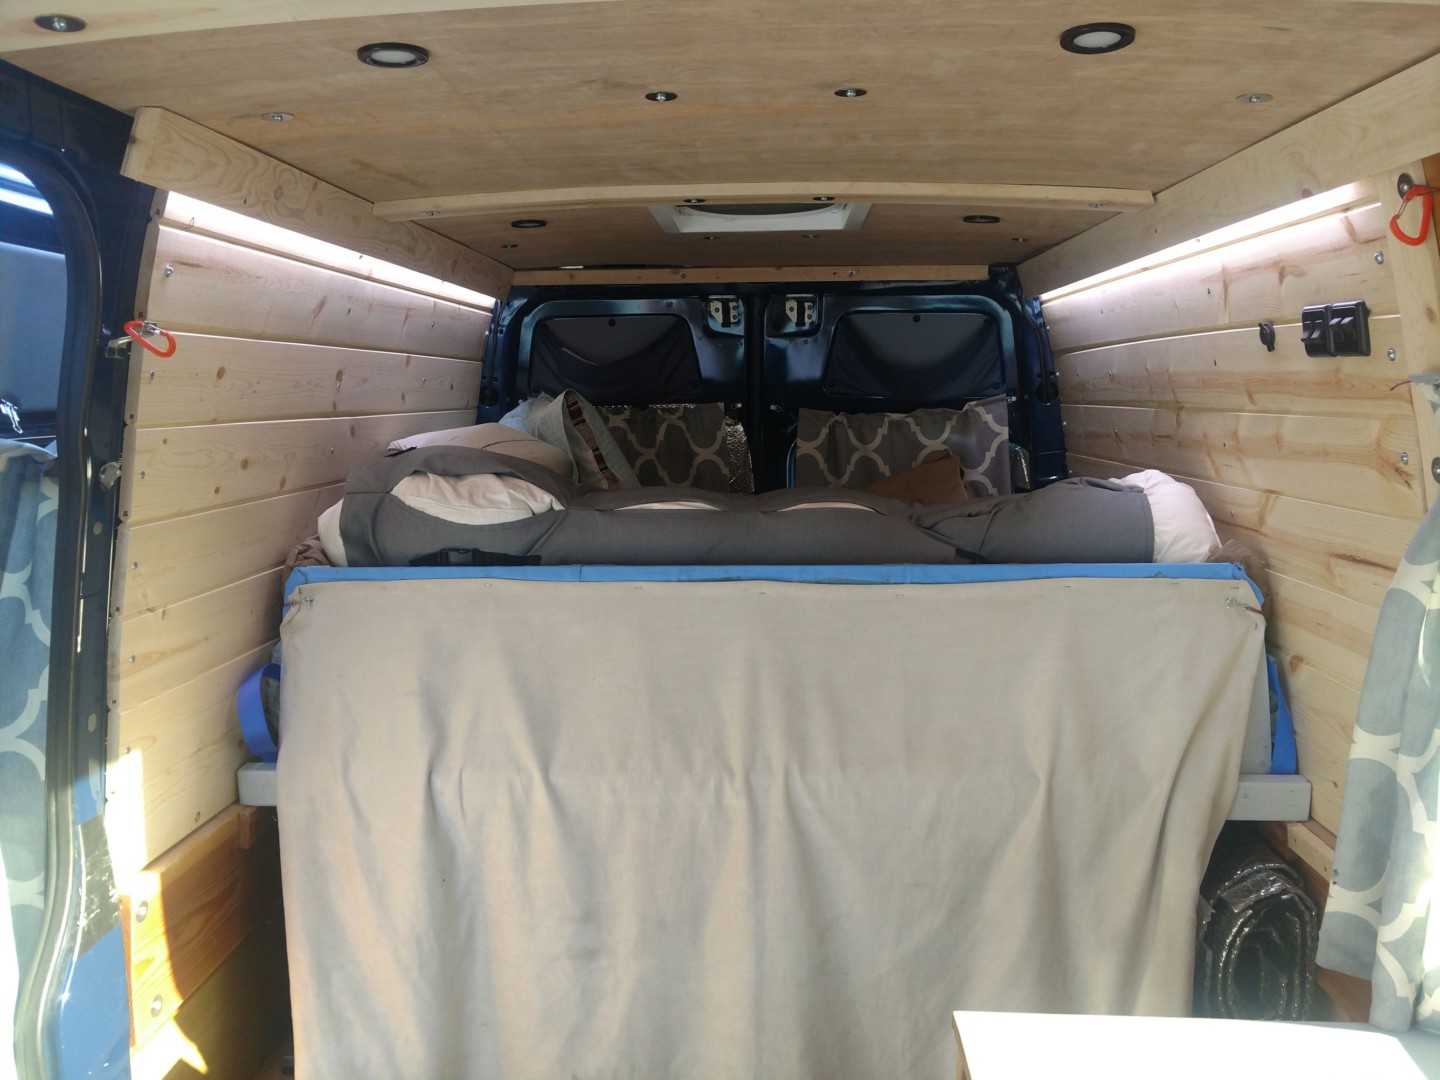
Summary (TL:DR): We pulled the factory ceiling and installed a plywood ceiling, with similar panels to the original factory styling – to match up with the existing metal roof ribs in the van. It looks great (my opinion) and opens up a bit more space along the corners of the van. We also installed new tongue and groove wall panels in our ‘bedroom’ area and improved the wall panels around the driver side window in the kitchen area.
Since we had originally purchased the crew van, our sprinter came with a factory ceiling. This was excellent in the beginning, since we didn’t need to do any initial work on that element (besides pull it out to put lights in), but after a couple years we got tired of it and the extra space it took up in the corners. So it was time to put in a new plywood panel ceiling.
 Overall this was pretty straightforward process. We made a trip to home depot and picked up 3 sheets of 4×8 3/32″ plywood. The light gauge plywood is nice because it forms easily to the curve of the ceiling – but it also has more of a tendency to ripple. 1/4″ plywood might be better from a “ripple” perspective, but that’s not what we got. We also purchased 1″x6″ tongue and groove boards to serve as wall panels in our bed area (shown at right).

We cut the plywood to match the width of the ceiling minus a couple inches to allow for cables to run by it (we constructed a cable tray to hide the cables but make them easily accessible for future wiring projects). The length of the panels we measured to go from the back of the van to the centerline of a few of the major metal ribs that traverse the van roof. These were similar to the factory ceiling spacing so we matched, that with 3 panels, two shorter length panels and one longer length panel. We placed four 1/4″ plusnuts into each of the van ribs and then either bolted directly through the panel to the ceiling (with 1/4″ bolt and large fender washer) or used 1″x4″ common furring strips to trim out the seam between panels and secure the panels to the ceiling. We thought this looked pretty good.

 T
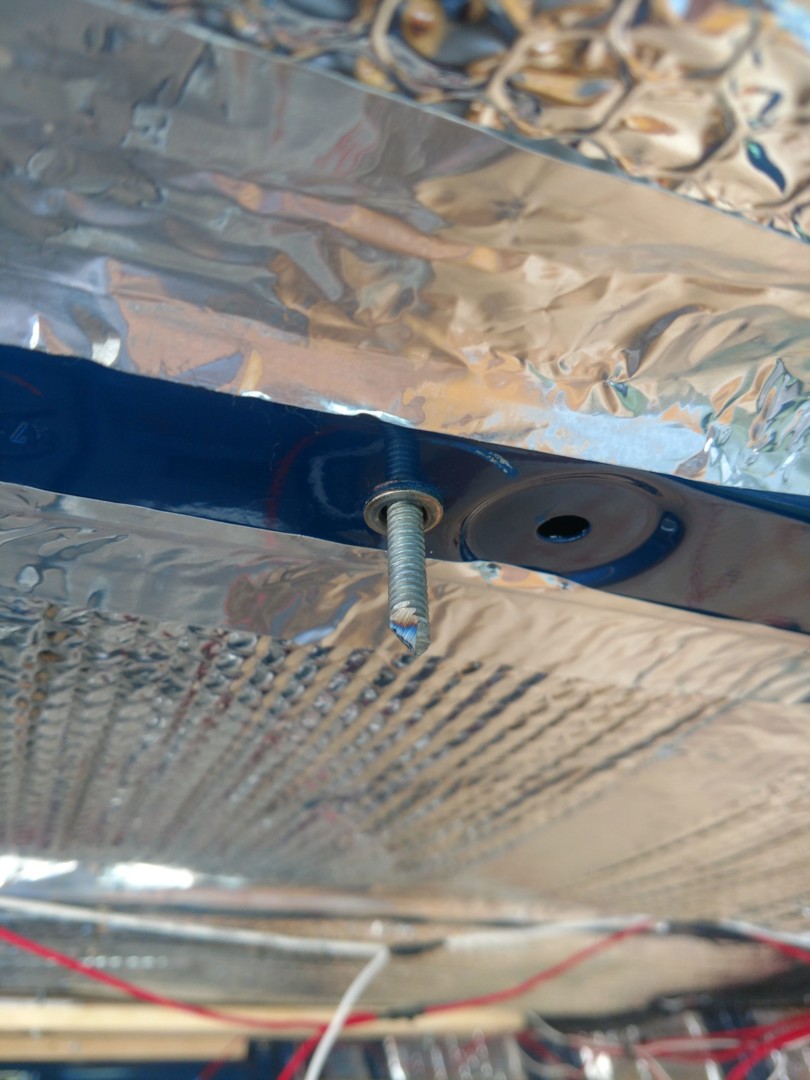
T he trickiest part was, once you place the rivnuts, how do you find those holes to line up the bolts, through the plywood. The solution is transfer screws! But of course, I didn’t have transfer screws and neither did my local hardware store. So, not wanting to wait around for a mail-order to come in, I made my own. I had some 1/4″ all thread sitting around from some previous projects so I cut it into short lengths (about 1.5″) and then used a grinder to file one end to a point. These worked out pretty well, If I was to do it again I would make them much shorter. 1/2″ would probably be just fine – but the ones I made worked out alright. You can see the homemade transfer screws in the photos to the right. Yes, I am sure the store bought version would work much better. But making your own in a pinch Provided you have a grinder and some 1/4″ bolts or all thread laying around that you are willing to sacrifice to the cause.
We also had to cut new holes in our new ceiling for our lights. We reused our same “Dream Lighting LED” lights that were previously installed in the factory ceiling. They popped out of the factory ceiling easily enough (though we had super glued them in and installed nicely into our new roof panels (we screwed them in this time). We used a 2-1/8″ hole saw to cut the openings to slot the lights in. These almost hold the lights in without any additional hardware – but to be sure we put in a couple of tiny screws to keep them secure down the bouncing roads. We positioned the six lights similar to how we and previously. Two in the back over the bed and four over the main (living room / kitchen ?) area.
 The tongue and groove wall panels installed fairly simply as well. Just a bunch of rivnuts and self tapping screws. Since we were forcing the wood to bend a bit to match the curvature of the van we decided that the more robust hold of the rivnuts would be preferred, versus just doing the whole thing with self tapping screws (which we have found work okay if they aren’t subject to any ‘pull out’ forces. Our method for lining things up more quickly (than using the ‘custom’ transfer screws) was to cut the boards to size, then drill a small hole through both the board and the van interior sheet metal. Then drill out the board and drill out the van interior sheet metal for a rivnut (actually a plusnut – because of pull-out concerns).

 This is kinda tedious as well, but helped us align the holes in our boards with the rivnuts we placed in the van more accurately (but not perfectly – we had to drill ‘oversized’ holes a few times 🙂 ). In order to better support the span across the rear window area (or where the rearmost van window would be, if we had one) we installed 1″x2″ furring strip boards that attached behind (between the board and the van wall) the 2″x12″ bed support rails at the bottom and used a flat bracket to attach to the van sheet metal at the top. We put two furring strips at roughly the 1/3 points of the span on both sides of the van. This appeared to add the desired level of rigidity to the wall panels in this area.
 One of the things I agonized over quite a bit was how we were going to attach the ceiling panels to the wall panels. In the end, we just didn’t do it. Instead, we just attached trim strips to the wall panels and left the ceiling panels unconnected to the walls. Yes, there is some rippling of the ceiling panels that you can see if you really want to look for it, but it doesn’t bother me (really). In order to create a little bit of space between the metal van wall and the interior wood walls we essentially made a little cable corridor which enclosed the area where we had previously run all of our electrical wires. To do this, we stopped our wall panels short of the ceiling by about 2″. We then placed a 3/4″ x 3/4″ strip along the top most wall panel board. This creates a bump out and allows for extra wiring clearance inside. We screwed and glued the 3/4″ square strip to the top most wall panel and then to that we placed a 1″x4″ furring strip, oriented pretty much vertically. Between the tongue and groove wall board, the 3/4″ strip and the 1″x4″ board we created a nice clear opening for the wires to run and a nice finished look on the inside of the van.
Above the kitchen, we reused one of the old w all panels that we had just taken off. Yes, its stained and most of the rest of the wood in the van is not at this point. We will likely stain the rest of it at some point, but not right now. Function before beauty. Below the window, we extended our previous wall panel up and added a little window sill, so we can now actually set things in that space at the window. This will definitely need to be stained and water sealed before next winter, as condensation would definitely wet out this board otherwise.

 Lastly, we wanted to make use of the party lights we had taken down when we put in the new ceiling. The 1″x4″ trip boards that made up our cable compartments at the ceiling/wall junction were oversized on purpose, such that there was space behind/underneath them – perfect for LED light strips. I have meant to do a full write-up on these 12V LED light strips, they are pretty amazing and look really cool.
  You can cut them to just about any length and then solder on new leads, so you can make as many light strips at as many lengths as you need. We stuck a strip underneath each cable compartment so that it shines down onto the bedroom area, but is shielded a bit so as not to be too bright (for bedtime reading and such). Plus it looks really neat.
All in all a pretty successful van remodel, which I think improves the overall aesthetics of the van, making it that much cozier to come back to after adventures outside.