Sprinter Adventure Van Build – Wall Panels
Tools:
- jigsaw
- drill
Materials:
- 1/4″ plywood
- self tapping sheet metal screws (hex head)
- cardboard
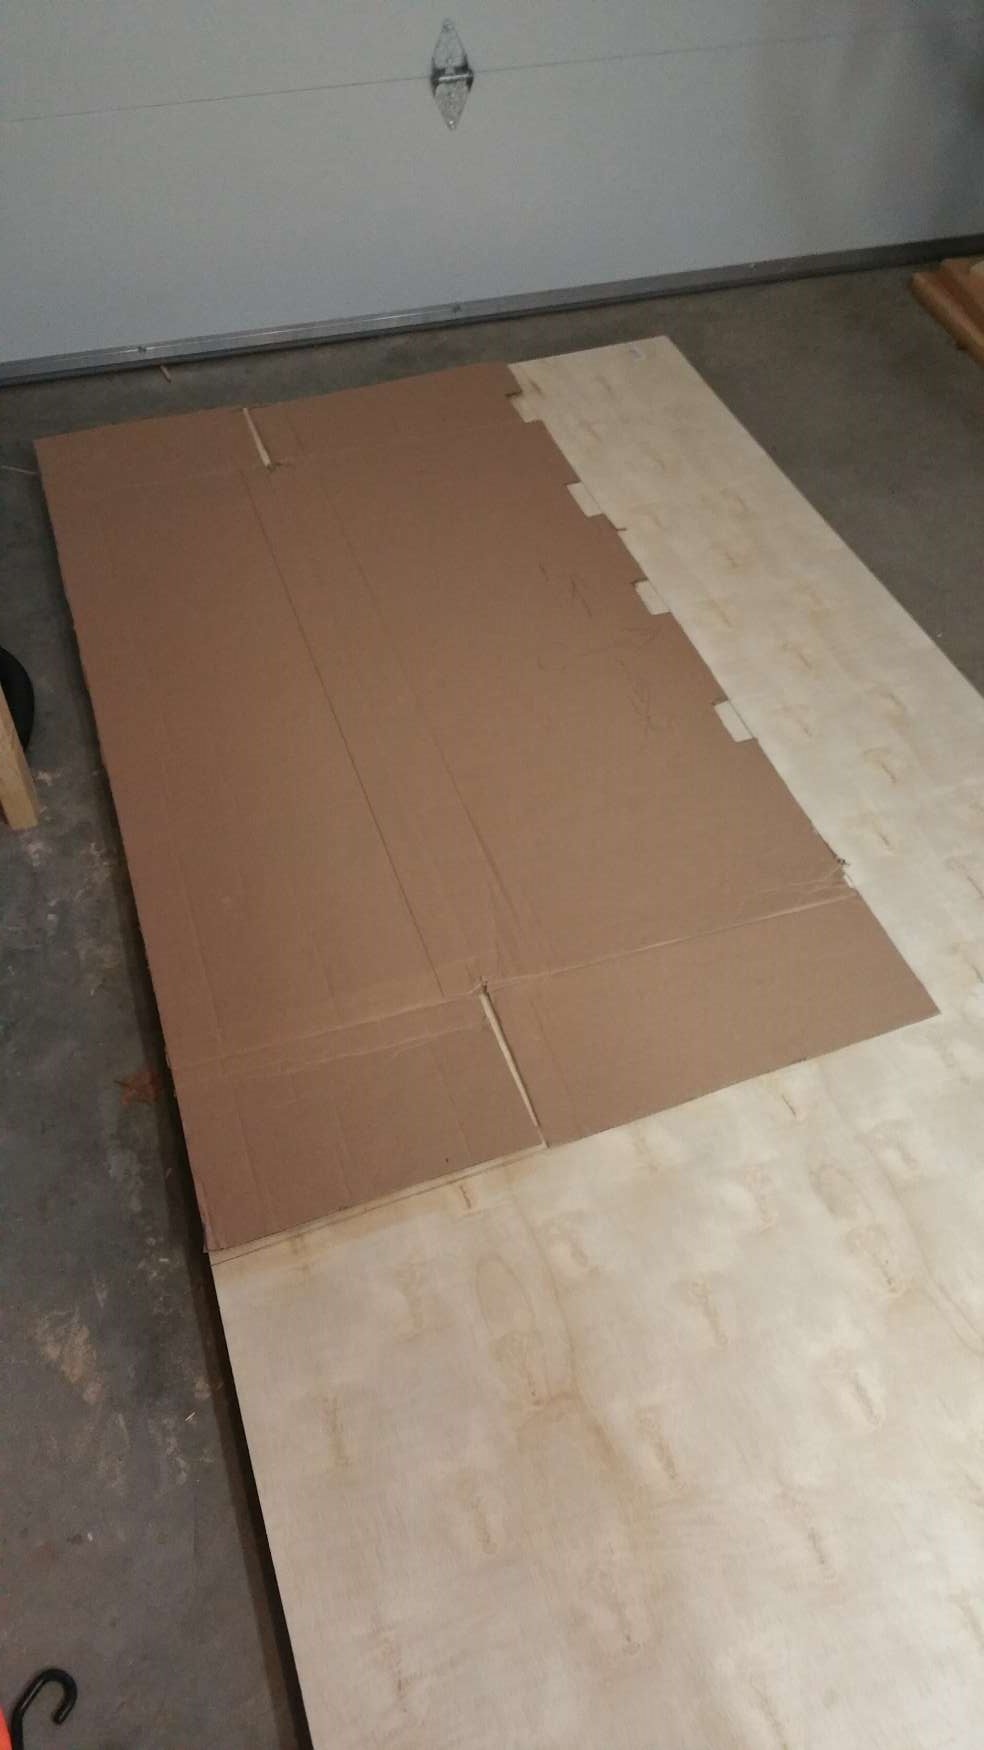
For wall panels, we purchased 1/4″ plywood from Home Depot. We could (and probably should) have gotten fancier stuff, to make it look better. But the stuff we got fit the budget at the time. We used large pieces of cardboard to create lightweight ‘templates’ of the wall panels we needed. Then we put the cardboard on top of our un-cut 4×8 sheets of plywood and traced around the outside. From there it was a pretty straightforward process of cutting along the line with a jigsaw. We screwed the wall panels to the van walls, using self tapping sheet metal screws. In the future I might change these out to be rivnuts, like most of the other mounting points in the van, but the sheet metal screws seem to be holding up just fine for now- so no rush in changing that any time soon. An advantage of using the sheet metal screws first is they were super easy to install using a cordless drill with an appropriately sized hex head bit on it. In the future, if we decide to change to a different fastener system, we will know exactly where to place the plusnuts and rill out the plywood panels – so that could be nice.


Later, we pulled the wall panels back off and stained them. While this process wasn’t entirely transformative, I do think it improves the overall van aesthetic.

In hind site doing something like SprinterVanDiaries, with cedar panels would probably have looked better (okay not probably, their van looks awesome), but given we already had the factory headliner – I think what we did turned out fine. And we can always change it in the future. We will certainly add some trim later (put that on the to-do list) to clean the looks up a bit.


